March 5, 2007

Solutions and Problems

First off, heres a list of some of the problems I have yet to solve.

1. Teeth and Tongue missing
2. Penetration of hair into face and eyebrows into hat
3. Eyebrow Wrap deformation
4. Right shoulder skinning
5. Stretched texture on planet
6. Roughness of polygons on planet surface

So I've started to go down this checklist, attempting to do some detective work.


Problem 1:

Solved--I discovered that somehow I accidentally included the teeth, the inside of the mouth (dubbed boca burger) and the tongue in my hidden blend shape layer, so I removed them from the layer and after realizing the tongue was in NURBS and I didn't have NURBS visible, I have solved that problem. However, this has brought about some new problems.

1. Penetration of Inside of Mouth Through Cheek
2. Tongue deformation

I think I've fixed the penetration of the inside of mouth through the cheek by moving the vertices of the "boca burger" inward as close to the teeth as possible.
As for the tongue deformation, I've discovered that the tongue deformation gets really weird as a result of scaling Norman down. Below are two images, the top displays the way the tongue looks when Norman is at scale=1 and the bottom is when Norman is at scale .016 (the one I'm using).


After hours of attempting to deconstruct Norman's tongue, I've finally fixed the problem.
Within the Local part of the rig itself there are three different groups that relate to the tongue:
ZGr_Cn_TongueA_Bind
contains the actual joints with an effector that connects to a spline IK outside of the rig
ZGr_Cn_TongueA_Driv
contains a series of groups, clusters and locators which manipulate a curve that in turn controls the deformation of different parts of the tongue
ZGr_Cn_TongueA
contains the controls to manipulate the locators, clusters and groups

In addition, there is a World Group that contains the Spline IK and the curve that the clusters are on.

I discovered that the problem was a double transform, as evidenced by the fact that the joints collapsed on top of each other when scaling the rig as small as I was attempting, and stretched the tongue out when scaling larger. After many trials of using multiply/divide nodes with different parts of the rig to attempt to cancel out these double transforms with no success, I realized that the double transform was in translate X, so I had to figure out how to control translate X of the joints. Lo and behold, there were already in place a series of utility nodes that controlled how much the joints, and in turn the tongue itself moved in translate X based on the spline IK.
A curve Info node, which queried the length of the spline IK curve, was fed into the first channel of this node and was multiplied by a pre-determined number, presumably a proportion of where that joint should fall along the length of the spline curve. There actually didn't seem to be any problem with how these utility nodes were set up--the spline curve scaled with the rig and the second number stayed a constant, so the ratio remained accurate. However, there was a double transform somewhere in the rig that didn't seem to be controllable elsewhere, so I figured using these nodes was the best way to counteract the problem.
To counteract the double transform, I needed an inverse proportion of the placer's scale. So I created a multiply/divide node, set the first input at 1, input the scale value for the placer as input 2 and set the function to divide. Then I duplicated the already existing nodes (there was one for each joint in the tongue chain) and put the pre-existing ratio as the first input. The output of the multiply/divide node (the inverse proportion) was fed into input two, and the result was a ration that would counteract the double transform. This value became input two in the already existing nodes, with the length of the spline curve as input one. Finally, this result multiplied out to become the new translate value in X of the joint.
Below is a screen grab of the connections I set up between the various nodes:

In simpler mathematical terms, lets say Justin's placer scale is A, the original proportion of the curve is B and the total length of the curve is C.

The original node setup read as follows:
B x C = translate X of joint

With my additional node, here is the new set-up:
1/A x B = B/A
C x B/A = new translate X of joint

In addition, the World Utilities Group doesn't scale with the rig, but the IK needs to. However, the pivot of the IK isn't in the right place to scale from, while the World Utilities Group that the IK is in has the pivot in the correct place. So I directly connected the scale of the placer to the scale of this group. The spline curve is also in this group and already scales correctly because its clusters are in the rig, so I merely unchecked the "Inherits Transform" box in the Attribute Editor so its parent group's scale doesn't affect its scale.

Unfortunately, solving this took all day. However, Problem 2 should be a simple modeling fix, and the right shoulder skinning can be copied from the left shoulder to fix Problem 4. Problems 5&6 are texturing problems and while they need to be dealt with, I can attack them a little further down the road.

Its really the eyebrow wrap problem that I want to solve next. Hopefully, I can do it a little more efficiently than the tongue.

February 28, 2007

The Midterm Cometh

Today was our midterm presentation and I reached my goal of posing Justin and figuring out the cameras in time. Unfortunately, because of two corrupted tiff files, I couldn't show my full story reel. However, I did pull it together, so here it is:


I feel like I'm on pace relative to the rest of the thesis class, though I have a lot of work ahead of me. March is serious animation month--ideally I finish the animation in March and get down to the nitty gritty texturing and lighting and rendering in April. Thats the plan for the moment at least.

February 21, 2007

Pieces in the key of Justin


(Image found on Head Injury Theater's website for Art Crash in September of 2006)

I've set the goal of having a completely posed, camera ready story reel for next week. So I've been spending a lot of time figuring out how to end the piece. After posing Justin all the way through attaching the red piece I had animator's block and couldn't figure out how to have the last yellow piece arrive.

In talking to Jenny, she referenced choreography advice that she had gotten--establish a pattern and then break it. It seemed like sound advice, and I'd already established this pattern of the pieces falling from the sky. What if the last piece existed already? This would inextricably bind up Justin as fated to construct this puzzle (if there was no way for this puzzle to be completed without the piece he possesses, then only he can finish it). But where to put the piece? It has the shape of a key, but unfortunately the piece is too big to fit in a pocket or go around his neck.

So I started thinking about somehow having the piece be a part of him...its somewhat outlandish, but after watching the Oscar Nominated Shorts at IFC Film Center, and seeing Maestro by Geza M. Toth (below), I reminded myself--push for stylized animation!

I didn't want him to lose a piece of himself--i.e. ear, nose, foot...so I'd rather the piece be imbedded in him. I couldn't seem to resolve how to do this, make it visible to the viewer and seem integrated into the world. I did like the idea of it in his neck and he goes back to scratch his neck and finds it, but it ended up being a little too complicated--and not in keeping with the world I've constructed.

In the end I decided to imbed the piece in the rock and what draws his attention to it is a smaller version of himself sitting on a rock on the piece--I love this idea (thanks to Lauren) because it enhances the idea of worlds within worlds. So, now I just have to pose it all and figure out cameras!

February 14, 2007

Setting new goals

To start, some inspiration...


The following video was made by a band called The Cobbs(formerly Mad Action). The song is called Smile and the video was created by Jonas Odell who works for a company called FilmTecknarna which is based in Sweden. I discovered a partially completed version of the video submitted at www.ralphrocks.com for a competition, but heres the finished version...damn impressive compositing work:


After meeting with Hosenfeld last week I was again reminded of a Radiohead video that is entirely CG with an unsmoothed Polygon look to it. I hadn't been able to find the video, but I finally buckled down and searched for it pretty hard and discovered it, for the song Go to Sleep:


Now for an update:

I've been working pretty hard this week on posing Justin, especially putting together the first three pieces--attempting some positions that don't work and then figuring it out. I've given him two failures and then a success each time so far, three is always enough to seem feasible but not too much to get monotonous. Of course, with three more pieces to add I intend less attempts for the others, probably two for the white piece and the red and yellow are pretty obvious once everything else is in place, so he'll probably just turn it over and inspect the puzzle and figure it out on the first go with those two. I also deleted the FPO (for placement only) cube and created a reference file for the rock, with a preliminary model. At the moment its bigger than I imagined, but it looks pretty good.

Some issues that have arisen as I've been working:

Shot 1, towards the end, when the camera starts to pan up to reveal the first piece falling. I'm realizing that he will be singing throughout the piece (though I'm only showing his lips here and there, so I will only be creating a lip sync occasionally, but I want it to feel as though he is singing the whole thing)--and I don't really want him to be singing "You were sent to me, fallen from the sky" before the piece lands in his lap...so I need to figure out what to do with the camera so you don't see his face when the lyrics start. Maybe I can cut to shot 2 earlier--at around frame 400 the camera has pulled in and not yet panned up to show the piece and the lyrics haven't started. I could just have the second shot follow the piece from further out.

Shot 6, the one after the close-up on "hey" and before he is down crouching on the ground has been broken into two shots: 6 and 6a. In 6 the camera pulls across to the right as the orange piece lands next to him. Then it pulls up over his left shoulder as he figures out how the green and orange fit. Shot 6a is still in the works. Somehow I need to show the blue piece land on his right side without completely disorienting the viewer. Cutting from over his left shoulder to a medium shot on his right side is jarring to say the least.

Shots 7, 8, 9
At the moment shot 6a pulls in slowly to show him fitting the blue piece in. Shot 7 then starts out again and follows the same long slow pull in to show his eyes reflected in the puzzle during the lyrics, "But no one can find me when I'm lost in your eyes." Both shots suggest a long slow pull...I just have to figure out how to make them different...shots 8 and 9 currently pan back and forth as he climbs back up on the rock and puts together the last few pieces--I need to minimize the panning, its a little much, and I'm toying with the idea that he doesn't get up and sit on the rock again...that maybe all the pieces land within reach on the rock or the ground and he finishes the puzzle sitting on the ground---this could mean that as he realizes that its a little planet, he stands up in shock...nice change of pose to denote change in emotion...this would completely change all of the camera movement...


So, my current goal is to try to get basic poses and cameras done for the whole thing by the end of the week...its a lot of work as I've only done about half of it so far, but I've done the harder part--it gets easier and there are less major poses. If I can get some more textures done early next week then for my wednesday meeting with Hosenfeld I can render out the whole thing. Ideally I'd reference in the puzzle ball twice more and place pieces floating in space as well as texture an environment sphere. That may be pushing it, but it would be a lot of progress from two weeks ago.

February 7, 2007

Group dynamics


After a lot of prep work I've begun the process of animation...Yay!!!
(Above is Justin's first pose that I worked on yesterday)

Lets recap on what has occurred to this point:

The problem of the IK/FK switch that stopped working when scaling Norman was fixed miraculously with the aid of Morgan Loomis (who wrote the script). Leif had me contact him, saying that he wasn't sure it could be fixed, but Morgan might be able to help. As doubtful as this made me that there was a solution, I pressed onward and contacted Morgan, who (again) miraculously, had a newer version of the script in which that problem has been fixed...so far so good.

My attempts at reskinning Norman are utter failures, as evidenced immediately upon posing Justin. (You can see the shoulder problems somewhat in the above image) I intend to go back and restore the skinning to the original settings. Along these lines, after having my first meeting with Hosenfeld today, he emphasized that I make sure not to push too much towards realism...stay stylized. With this in mind, I'm giving up trying to unify the arm and leg Geo...Justin will be puppet-like...perhaps I'll have holes in the knees or patches of different colors, but the simpler the geo the better.

Now, to what I am working on at the moment.

I have begun to create poses for Justin--attempting to put some timidity and childlike behavior into them...first I'm just trying to get the basic concept down, then I intend to go back and work on silhouettes and body arc lines. Below is one of the poses...


As is evident in the image, I'm beginning to get him to put together the pieces. As of yet I haven't decided when and where and how to constrain the pieces to his hands. However, I did decide to create a grouping system in the reference file so that there are nested groups for the putting together of the puzzle. I can animate the green piece alone until the orange piece gets slid into place. First off, to make sure that the green and orange piece lock solidly, I reset their translate and rotate to zero so they are at default position, where they are already together. Then, there is a group above orange and green that contains the two together. So I switch from animating them individually to the group above them. This group is then grouped with the blue piece to create a new set, and so on...giving me a tiered system to animate different groups for each phase of the puzzle. I haven't quite figured out how I will go about making sure the pieces don't jump around as I switch groups, but for the moment its a very helpful structure for blocking out the poses.

February 1, 2007

Reality Check


Above is my original Production Schedule as I planned it last semester during PreVis. Based on its progression, I am behind schedule, as I am finishing week 2 of the semester and should have completed shots 1-3 preliminary animation. In retrospect the schedule was a little too optimistic about my ability to model and texture everything in a couple weeks. However, I feel I gave myself way more time to do animation than is necessary (of course, the more time I have, the better then animation would be--but I have to balance the time spent on animation with completing all the other elements as well), so I'm not too worried--I expect to start animating in a week or so and believe I should be able to do a first pass of the entire piece in 2-3 weeks, and that should put me back on track.

Once the cameras are set, beginning animation should be fairly simple--I plan to reference in the two Justins into the Master File and scale them based on the Normans that are currently in the scene. Then I can block out my animation based on the simple poses I created for Norman--but with quite a bit more thought put into silhouettes, body curvature...etc...

I was a little worried that since I changed my cameras between my second animatic and my final Previs materials (because of slight story changes), that it would be a lot of work to fix them. Fortunately, they are all iterations of the original cameras, and it looks like I only have to change a couple shots. So the goal for the day is to get all the cameras set so next week I can begin animation!
-------------------------------------------------------------------------------------
(Later that day...)

I've not only set all 9 of my cameras according to my shot sheets, but I've created a new camera rig where all 9 cameras are inputed into a new shot cam so I can quickly see what an edit would look like. Of course, I can still render out from each individual camera, however, this way I can play blast the whole piece quickly and get a sense of how the camera movement and character animation are looking over a number of shots.
As well, I've referenced in both Justins and scaled them according to the corresponding Normans that I used as placeholders. I still haven't figured out what to do about the IK/FK Switch issue, but I'm going to move ahead and hopefully will not need to use it. If a solution comes about, it shouldn't be difficult to scale the placer back to 1 (if necessary) so I can make the proper adjustments.
Starting next week I'm going to pose the small Justin based on the original poses I created for Norman and can begin to nail down the blocking.
I expect that the camera will have to change some since the blocking I did for Norman was so quick and dirty. Fortunately, since each shot is its own camera, adjusting for pose changes should be really easy. As such, I don't plan to render out anything until I have the cameras set. I can create new playblasts as I'm altering the poses and cameras to further my story reel from the animatic, but its just a waste of time to render before I have anything that can be deemed "final."
Meanwhile, I plan to continue fleshing out (literally) Justin and the planet modeling and texturing as I begin the animation process. Theres only so long you can animate before you start to lose it!

January 31, 2007

References available upon request

Referencing

In the past couple days I have entered the land of references, building my scene files out so that I can begin to animate. I'm spending quite a bit of time on naming conventions and testing various aspects of my files to make sure that all the manipulating of files I will be doing is feasible. I've already dealt with quite a number of problems...

I began by reorganizing my scene files into subfolders, as below:


These folders (Animattic, Environments, Justin, and Master) allow me to continue working on the planet, its modeling, texturing and other environmental elements separately from remodelling and skinning Justin. I can, within a subfolder of each of these categories (as is visible in the Justin folder), continue to hone each element, saving regularly, and then resaving as the _Ref file when an element is completed and the file is clean (doesn't have extra Geo, Layers, Utilities or Shaders). The changes will ripple through the pipeline and when I open the Master_Ref file, everything will be updated.

Originally I was going to have separate files for each Shot so as to keep the files very light, however, this makes a couple things very difficult. I would have to animate linearly so that the end pose from shot 1 matches the beginning pose of shot 2, I'd either have to resave Shot 1 as Shot2 or copy all the numbers, which is a waste of time. Also, the one huge benefit of a camera rig is being able to playblast the entire piece very quickly. If I do all the animation in one file with separate cameras for each shot, I can always create a new camera, orient and point constrain it to all the cameras and key it so it jumps from shot to shot, allowing a quick playblast of all of my individual cameras. I can then delete and recreate this rig whenever I need to.

So, I've decided to do all the animation in one Master file, where the environments (the planet referenced twice as the Big and Small, and global sphere for the universe, as well as floating planet pieces throughout), and Justin (also referenced twice) are all referenced into one central file where all the animation exists.

Problems

The first problem I have come across during my referencing stint is with the IK/FK Switch script that is designed to allow seamless transitions from one to the other. Its a really useful script, and, like much of the Norman rig, a great thing to take advantage of since I have it.
After referencing Justin into my Master file I discovered that the script didn't work, causing a downward spiral of depression and self-loathing. No, but seriously--it meant I had to go back and figure out at which point the script stopped working. Fortunately, after some exploration, I discovered that none of my modifications to the rig were the problem, and since I was using distinct namespaces for each referenced rig, the reference wasn't the problem either. Unfortunately, something I expected to do very easily is now a problem--scaling Justin. Apparently, when the Placer is scaled it completely screws with the IK/FK script. I'd love to figure out how to fix the problem, but I have yet to attempt any rewriting of the script or creative grouping.

The real issue with scaling (in addition to the fact that I have two Normans that need to be scaled differently) is that the smaller the scene is the better--as Lauren pointed out, render times are exponentially faster the smaller the scene is--less calculation time for lighting, and the smaller the numbers, the less processing overall. So, I could potentially leave the small Justin at a scale of 1 so the switch would work, but that means that the planet is bigger and the big Justin is enormous. I probably won't need to use the switch on the big Justin since he basically holds a pose, however, then the scene is very large. My plan had been to make the large Justin at scale 1 everything else would be smaller. As of yet, I have no idea how I'm going to deal with this...

Moving along, I decided to take my camera rig and duplicate out each shot as a separate camera. In my hasty stupidity, this ended up taking many tries. I figured out fairly quickly that the duplicate options allows you to keep keys when duplicating. However, I discovered this using the Duplicate Input Connections box, which means that all duplicated objects share the same keys and deleting keys from one deletes them from all the others. After multiple attempts I realized this was the problem and changed to Duplicate Input Graph which creates a distinct set of keys (a distinct graph) for all duplicates, allowing modification without affecting the original.


So I'm currently at a crossroads where the cameras from my animattic are separated out and I can begin to get them set permanently. I'm a little unsure about the scaling issue but I'd rather sacrifice the IK/FK Switch and have lower renders, so for the moment I'm continuing as planned. I hope to set the cameras by the end of the day tomorrow so I can update my story reel with some beginning textures, my Justin rig thus far and some solidified camera movements and positions.

January 25, 2007

Editing Norman and Rigging Dilemmas

Editing Norman

In the past couple of days I've been on the Spline Doctors Blog where I've seen a bunch of uses of Norman remodeled to make various characters. Students at the Academy of Art in SF taking the Pixar classes have taken Norman and remodeled him a dozen times, as witnessed by all the characters below:


For one of their classes they have taken Norman and turned him into a space captain (below, top) for a short film the entire class is creating together, a clip of which is below.


and turned him into a space astronaut for the video below:


Rigging Dilemmas
Most of the characters use Norman's geometry and minimal remodeling, mostly of the face. However, a few of the characters are smoothly bound with single mesh geometry for the upper body. It seems that all of them have kept the legs as is, with a few creative flairs to hide the knees and make the lower leg into a boot. The one model that is completely smooth bound is the kid (shown with both blond and brown hair) and, as is obvious from the animator's website, Aaron Koressel built this character (Hordy) himself, whereas all the other characters are Norman.

To some degree I would love my character to have a uniform mesh as an upper body, however, it seems I would have to sacrifice some capabilities of the rig to make this happen. Here are my options:

1. Wrap Deformer
I could use a wrap deformer and wrap a single mesh to geo that is already skinned...however, this takes forever to render and wrap deformers are quite quirky...so moving on...
2. Rebuild/Reskin Geo
I could delete the upper body geo and build my own and reskin...however, the current geo is skinned to the bend bones which are the lowest level of skeleton and therefore respond to all the other parent skeleton systems. To get a smooth bind, I would have to skin the single mesh to a higher level of skeleton, causing me to lose bend bone and stretchy functionality. Plus forearm collapse and shoulder collapse is a worry, especially since the rig doesn't have extra joints built in to counter arm collapse
3. Blend shape
I've been using blend shapes fairly effectively, but the geo remains separate pieces...looking at the space captain above, it is possible to keep the geo as separate pieces and still have it look damn good--so perhaps I should continue along this path.
3a. Substitute Geo
I've discovered a skinning tool that allows you to swap geo that has exactly the same parameters as the one already skinned. Limitations are that it can't have blend shapes on it (so this can't be used with the face), and of course, that, as with blend shapes, there is no appending to the geo. However, because it is possible to smooth skinned geo and delete the non-deformer history, more detail is possible....
This option can be used in conjunction with the blend shapes, start with blend shapes and then delete them and just swap geo, this will minimize history.

After a lot of thought on the subject, I've decided to go with the third option. Since modeling and rigging are not my focus, I would rather minimize the time spent on them. As well, being that my piece is whimsical--the less realistic my character is, the better he will match his environment. So, instead of seeing the Norman rig's "rigid" bind as a stumbling block, I aim to play up and incorporate these elements into my remodeling. First off, I am a big fan of the patchwork look.. a la Sally the rag doll in Tim Burtons Nightmare Before Christmas. (below)


Unfortunately, patchwork generally has stitching across seams, not along them, so the idea of drawing stitching along the edges of geometry (especially since it separates) is not really a solution to my problem. I could play up the edges by using toon shader edges, something I'd been wanting to incorporate through previs. By drawing the textures in colored pencil and creating black outlines of all the geometry, perhaps I'll get a new twist on subtlety in the form of the hand drawn colored pencils, with in your face graphic art in harsh black outlined edges. I'll have to see how this looks with the Nose, Ears and Hair. Adding edges might have to be a selective thing so it doesn't overwhelm the character..
To be continued...

January 24, 2007

Face Texture

Images of Justin's face Texture:


Just Colored Pencil:


Posterized:


Posterized with Color Adjustment:


From the Side (same as Above):


I'm happiest with the last, but the stubble is too large, it should be dots, not strokes...and the lips are smeary and large, it looks like he is wearing lipstick...needs some work, perhaps a larger texture so I can go into more detail...

January 23, 2007

Further Skinning and Rigging Issues

Rigging
I've solved the eye issues---the rig includes a number of locators and clusters that control the eyelid deformation and they all have to be centered at the same place as the eye to work properly. So, in addition to detaching the head Geo with history on, moving the parent eye joint and reskinning the head so the eyelids didn't move with the eye, I also had to move locators and cluster pivots. All in all the eyes work fine, though the eye aim doesn't work anymore--I tried to realign the curves with the new position of the eyes, but the aim has a bunch of utilities built in that I couldn't figure out how to fix, and honestly, I should animate the eyes locally anyway.

Modeling
I've spent a lot more time on the face. I finished the hair modeling, added eyebrows and continued to tweak the eye sockets. They are far more almond-shaped now and look much more human. I made the nose a little less childlike by pulling the tip in a little so it doesn't look so much like a cherub. As well I pared back the cheeks some. Using my own advice I scaled the rig to get the head and hat/hair geo to have more depth and used that geo as blend shapes so the controls aren't scaled. I worked on the modeling of the upper body and the arms, as well as adding a hood to the sweatshirt he's wearing, with a pull cord. I've remodeled the pelvis and the thighs some the start to get pant-like legs instead of thin sticks. Below is a 3/4 shot of the model at the moment.


Skinning
I've worked on the skinning of the shoulders and am fairly happy with the result. There is a fairly smooth transition between the three pieces of geometry that merge at the shoulder--the upper arm, the shoulder ball and the torso. I'm a little worried that the intersecting geometry will look bad in renders, but I am hoping to give the texturing a very funky, stitched look. It will match the bohemian, hippie/skater style that I'm going for and hopefully I can get the stitching to fall along the edges of the various pieces of geometry. Below is an image of the back of the model with the shoulders in extreme positions. As well, the modeling of the hood is evident.


The problem I'm having currently is skinning at the elbows (and I am guessing I will have the same troubles with the knees, though I haven't tried to skin them yet). Because there are bendable bones built into the rig the arms are weighted to joints for the purpose of bending them. Instead of having a sphere as the elbow, I would rather weight the upper arm and forearm end vertices the same so that it becomes one continuous arm in the same way I skinned the shoulders. However, I'm having trouble figuring out which joint to weight the vertices to so that they move with the elbow. I've tried a number of the joints but none of them seem to do anything. I will have to keep experimenting...

January 16, 2007

PreSemester Progress

I've been alternating between modeling and texturing, I've had some progress and some setbacks with each.

Texturing:

The texturing is coming pretty well as a basic start, below is a quick render of the planet as it currently looks.


At the moment the image gets pretty pixelated when the camera moves in for close-ups so I'm going to have to scan the image at higher resolution. There is obvious faceting which doesn't seem to be solved by smoothing. The problem is solved by softening normals, however, because they are separate pieces, if I soften the edge normals the image fades to black along the edge and the individual pieces are obvious--this can be seen below.


I may have to do a visibility switch where I use a sphere for the end when the camera pulls out. The faceting shouldn't be an issue for the small pieces the smaller Justin manipulates, so a visibility switch won't be necessary.

Modeling:

As far as modeling Justin goes, I've been tweaking the face, smoothing out the cheeks and softening the chin. I also imported the ears I created for my original model of Justin and replaced Norman's ears. I created a hat/hair piece and am in the midst of extruding faces to make his hair stick out. He's looking more and more like a human and like Justin, which is encouraging.

I'm having some trouble with the body--unlike the head which is skinned to only one joint, the body is skinned between joints and it seems that adding a blend shape doesn't deform the geometry fully.--Just solved the problem...Because I smoothed the geo after it was skinned, there was unnecessary history active, so I deleted the nondeformer history, recreated the blend shape at front of chain and it works!

The one issue I'm still having is with the eyes. The twist controls on the eyes are on the parent eye joint, which i never moved, so the eye is rotating around an external pivot. This seems to be the issue with the lid twist controls as well. Still trying to figure out what to do about this...

Here's a screenshot of the model at the moment:


Also, it seems that I've discovered the reason the mouth flapped open and closed when rotating the head last semester--scaling the head control does it. I noticed that the head is very flat from front to back, as is obvious in the side view below.


I attempted to scale the head to fix the problem but I guess since scaling the head control scales the other controls, somehow distortion occurs and the geometry gets deformed bizarrely.

An easy solution to my problem is to duplicate the geometry while the head is scaled to the shape I like and use this new stretched geometry as blend shapes.

January 10, 2007

Mindful of additional inspiration

As I plunge into thesis land, I've begun to notice aspects of other media that are good examples for me to follow, and reminders of some of the ideas I've come up with to solve the complexities of the work ahead.

Sdrawkcab Krow (Work Backwards):

A video that is circulating the internet (below) and available on "YouTube" shows Michel Gondry, the music video master, solving a rubik's cube with his feet. As with most Gondry videos, it is an illusion of trick editing. In this case he took a solved rubik's cube and used his feet to mess it up and then played the video backwards--with some sound editing and cutting, the video is pretty convincing aside from a few odd quirks that are pointed out by the user "BeyondBeliefMedia" in his video "How Michel Gondry Faked His Rubik's Cube Stunt".


The video points out the concept of making sure the puzzle is solved by working backwards. I expect this idea will be invaluable in having Justin solve the puzzle ball--by starting with the final pose of the just completed puzzle and working backwards, I can make sure the puzzle is solved successfully and in a convincing manner.

Near and Far:

While watching "The Little Mermaid" the other day I was reminded of a concept I have been developing to minimize the amount of animation necessary while still being able to convey the video and complete the piece. I have been planning to intercut between close-ups of Justin with the puzzle ball with wide, sweeping shots of the entire planet to alternate the focus from detailed, convincing animation to storytelling and expressive camera movement. Disney did just this--I bet--for the same reasons, and its very evident during "Under the Sea" (below). The close-ups allow for really nuanced movement and lip sync which keeps the audience aligned with Sebastian, while the wide shots allow far simpler animation of Sebastian and shows the performance of the other fish, fulfilling the narrative purpose of the musical number.


Dreamweaver:


To some degree I intend this video to function as a dream sequence...a place where fate seems to have a way of directing everything that happens. I'm currently reading "Neil Gaiman's" "American Gods" and a comment he makes about "dreams" stuck with me as a great way to word the "dreamworldly" quality I hope to create within the video:

"It was a dream. and in dreams you have no choices: either there are no decisions to be made, or they were made for you long before ever the dream began."
(p. 303)

January 9, 2007

Parallel Pipeline Setup & UV Layout

As hard as it is to get back into the swing of things with the holidays only recently gone, I am attempting to focus on getting the preliminary setup done. And, if I use references for the rig and the planet, I can continue to update modeling and texturing for both as I'm animating, creating a sort of parallel pipeline where I can alternate which aspect I work on without affecting the others. Of course, this means some setup is required--i.e. laying out UVs, applying basic textures to make sure the look is basically what I want and some basic modeling to make sure the blend shapes don't ruin the skinning or the other facial blend shapes. So I've begun to do the UV layout for the planet, which is coming along, but is far more time consuming than I imagined...in addition to having to select all the outer faces of each piece to create one spherical projected UV map for the outer shell of the planet, I also have to have separate planar projections for each internal plane and layout all of these relative to each other within UV maps for each piece. Fortunately, my scripting knowledge has come in handy, so for the outer shell I created a Quick Select Set and wrote a two line code to add additional faces to the set:

{
string $x[] = `ls -sl`;
sets -edit -forceElement FacesSoFar $x;
};

This way I can create a Quick Select Set, and then select outer faces for each piece individually (with the others hidden) and add those faces to the set.
This makes it far easier to make sure no internal faces are in this set.

In total it has taken me two days to layout all the UVs for the planet pieces. Below is an image I created in photoshop, using UV snapshots of each piece and then I colored them relative to their original color (see post "Constructing the World" for photo of actual puzzle ball). Using a printout of this UV Layout I intend to draw in colored pencil the texture map for the planet. Instead of offsetting the image in photoshop and having to edit the edges to allow for tiling, I will fold the drawing and draw across the border to prevent seams.


I have also completed laying out UVs for the inside surfaces of all the pieces, however, it remains to be seen whether they will need some tweaking when I attempt to draw their images. Below are the UV maps for the six pieces.


As far as setting up referencing, I intend to use the animattic scene from my previs since it already has basic camera movement setup...However I will have to delete the rig and the planets because I need to import the new files I've worked on as reference. (I was hoping to just transfer UVs for the planets but the pieces had some extra faces that I hadn't noticed, which required some changes in geometry, so I will have to start over with that...oh well).

January 4, 2007

Back to work - Modeling Technicalities

After a brief break for the holidays, I'm back to work, aiming to stay on top of my production schedule by completing modeling and texturing before the semester begins. My preliminary issues are how to model and texture Justin when the Geo is already skinned. Lauren discovered a great texturing trick during her thesis where you can layout UVs on a duplicated version of a piece of Geo and transfer to the original as long as they are exactly the same in terms of number of vertices. Within the Modeling Menus, under Polygons --> Transfer there is an option to transfer UVs. So I can use all of the blend shape Geo I will be building to lay out the UVs of the skinned Geo. As for modeling, the biggest issue is making sure not to ruin the facial blend shapes. With the kid I modeled for character 2 moving the eyes ruined the main Lid controls. I had moved the joint itself, which Leif had seemed squeamish about. So this time I unlocked the translate of the eye control and moved the eye control--something I had tried originally with the kid, but didn't seem to work. I'm realizing the reason this doesn't work is for eye rotation because the center of rotation is where the joint is, not the control...so when I move the eye aim or rotate the head the eyes pop out of the head---I guess I will have to move the joints themselves.

The issue with moving the joints is that there are 4 joints for each eye, making it kind of complicated to determine which to move. There is an EyeArea joint that has the innermost eyelids bound to it so that for extreme movement, the eyes can pop out of the head and still be attached to the skin. Because of this skinning, I can't move any parent joint of the EyeArea joint or the Geo will be affected. So the only joint I can move is the jntRig_Rt_Eye (& JntRig_Lf_Eye). This is the joint I ended up moving in the kid last semester which for some reason ruined the basic eyelid controls. After moving the joint now the eyelid controls still work, so I'll have to check periodically and make sure moving this joint isn't the problem.

December 6, 2006

Pulling it all together


First off, here as an inspirational image called Sadness I found doing a google search for "sad man"--the photo is a part of a series on "Flickr" called "Man on the World" by "Azchael".
I stumbled upon this image while searching for the emotions I want to express in my piece and its amazing that this model with no facial features truly conveys sadness and an introspective quality exactly like the feeling I want for the beginning of my piece. Its just a reminder that body position conveys a lot and the face can amplify the emotion, but is an added bonus, not the only, or even most important tool to get emotion across.

In pulling together all of my storyboards, research and source images, I realized that the best way to really nail down how my story happens, namely how Justin puts the pieces of the puzzle together is to do a videomatic where I film myself with the music playing getting the pieces at the right time and actually construct the puzzle. This should indicate whether there is enough time for me to construct the puzzle with a little bit of difficulty built in. As well, it will be great reference for creating interesting poses throughout the piece. In addition, for my storyboards it seemed important to indicate all the changes in emotion so I searched for facial expressions and found the following two face charts:

I decided to use the one on the left and to indicate the intended expression for each storyboard by pasting the corresponding face in the corner. This way I have additional information to pull from my storyboards without having to redraw them.

After meeting with Michael on Monday I have compiled a list of what I have left to do for next week. Here goes:

Videomatic --> Shot Sheets (+ shot 0) Tasks
Production Schedule
Style frame/Mood boards
Introduction
Research Paper - Image list (w/fig numbers on images)
Add Journals to the end


First I need to create a videomatic, which will inform redoing my shot sheets (including adding in a shot 0 which is all the modeling, texturing, rigging...everything I need to do before animating). My shot sheets should list my tasks, i.e. what motions the character will go through in each shot so I can estimate the amount of time it will take to animate. For example, in the first shot, a long slow pull in to Justin sitting on the rock looking forlorn. He will stay basically in the same pose--a head on the hand sort of thing, like the image at the top of this post, and maybe he will take a deep breath and let it out, exasperated.

Once I get all this done, I need to create a production schedule in the form of a Gantt chart that breaks up all my tasks by shot and allots time to do everything.

I need to create some more Production Design in the form of a style frame--using Richard's drawing, adding in color and a background. Maybe a mood board too.

Finally I need to throw an introduction to the whole thing at the beginning, add an image list into the paper and copy this entire journal to the end of the paper.

November 29, 2006

Meeting with Richard Bailey

Before class I met with Zeth's friend Richard Bailey and he quickly drew up some really nice images based on the photo I have of Justin.


I had already decided that I would not build a rig and instead use the Norman rig given to us for Character 2, and now, looking at these drawings, I have decided to scrap the model I built of Justin and instead really stylize him based on these drawings. I hadn't believed that the proportions could be pushed so far and still resemble Justin so much, but its all about keeping some of the features--shape of nose, type of hair, hat...etc. So it looks like I have quite a bit more work ahead of me than I had originally planned. Oh well, c'est la vie.

November 22, 2006

Putting together a puzzle
during a meteor shower


Okay, here's a new snag. After completing my second animattic I've realized that there is no way Justin can assemble the entire puzzle ball between the 2nd meteor shower and the end of the song...its about a third of the entire piece--maybe if he knew exactly how the pieces fit together this would work, but the whole point is him exploring these pieces and figuring out how they fit together.

Brainstorming Ideas:

The Texturing Solution:
Unlike the original puzzle ball which has completely random solid colors so that the pieces don't relate, if I texture the ball as a solid piece (a la the soccer ball assignment) then it will be far more obvious how the pieces fit together. This still doesn't solve the timing issue, but its a start.

The Timing Solution:
Instead of having all the pieces fall during the 2nd meteor shower, they could fall progressively, one after another (in the right order, even) which would allow a little time for Justin to interact with the new piece and to figure out how to fit it in to the growing orb.

The Hosenfeld No-gravity Idea:
As Hosenfeld astutely pointed out--this is outer space--there doesn't have to be normal gravity. I had already been picturing duplicated versions of the pieces I've built floating around in outer space to fill out the environment somewhat. In addition, the pieces don't necessarily have to fall to the planet, they could merely float by. This makes the border between fate and chance a little blurrier, so I'm thinking perhaps I will have pieces float around, but not the ones he interacts with. (Another good idea from Hosenfeld--have a piece or two float right in front of the camera, really bring the camera into the environment)

Issues:
These are all good ideas and can be incorporated together to work as a whole, however, the timing solution breaks up the three distinctive meteor showers that I had occurring at the beginning of each stanza. I really like the visual structure of these showers...the repetition of three...the progression from medium to heavy to light. Somehow I have to integrate pieces falling in a paced manner--ideally in relation to the song--while still having three distinctive showers. As well, how the meteors in these showers interact with the asteroid fragments floating in space needs to be addressed.

November 15, 2006

Texturing Trials

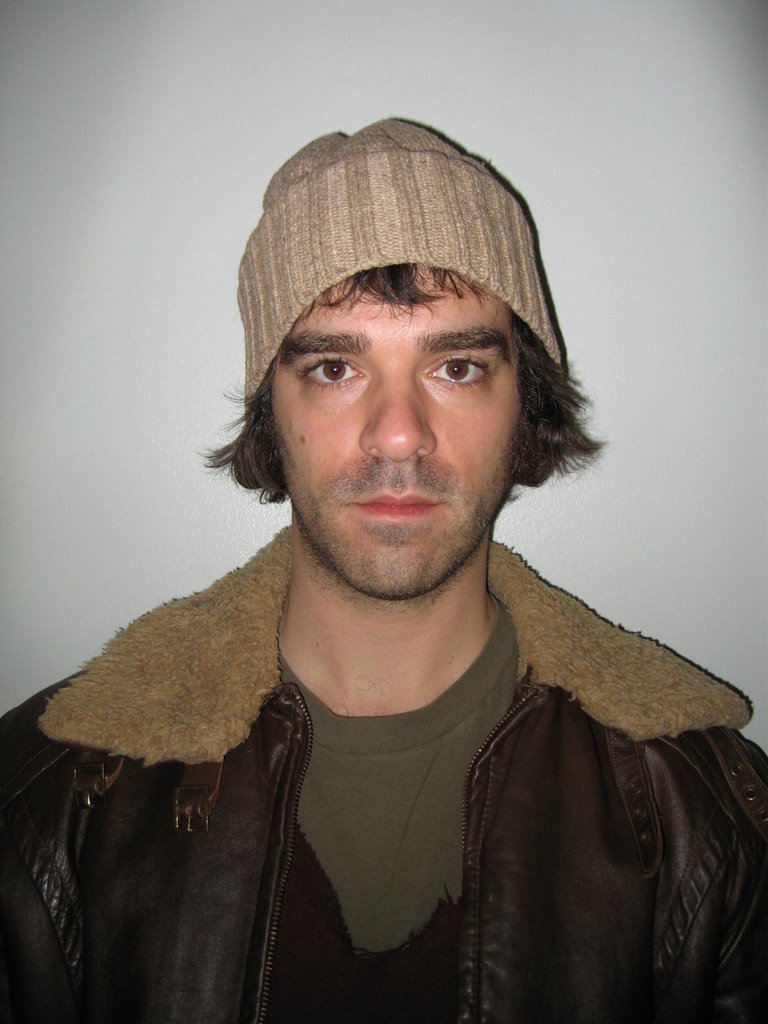
So this week the focus has been on texturing the piece...and I've started to brainstorm how to get the look I want. I started by taking the image I have of Justin (below)

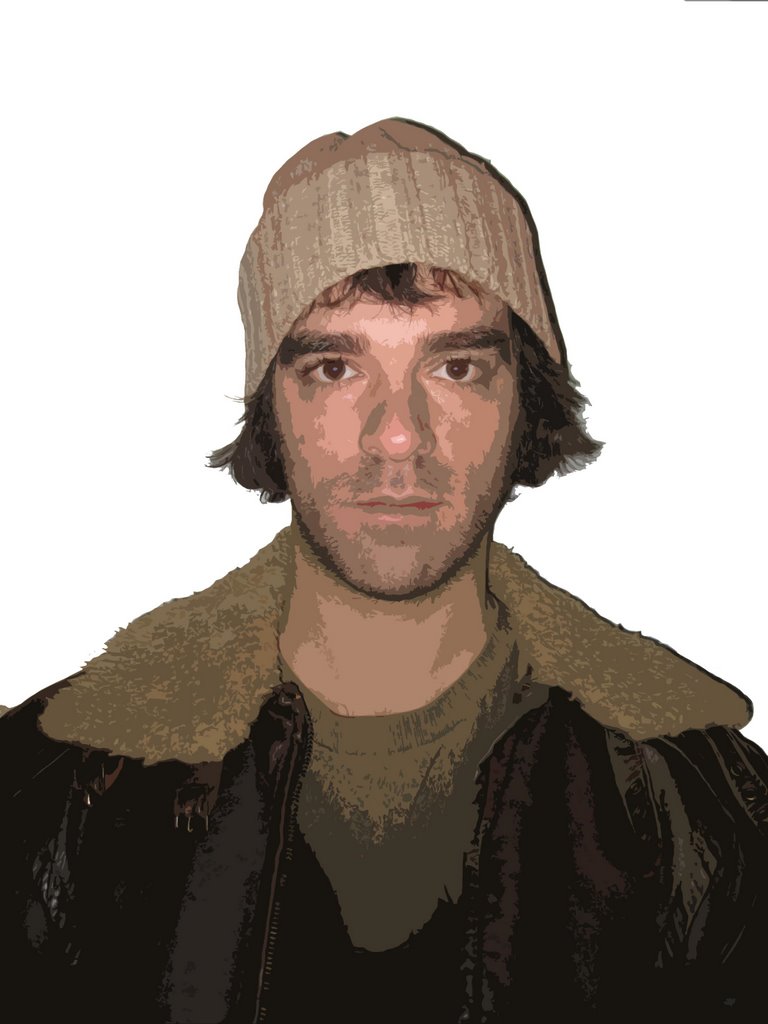
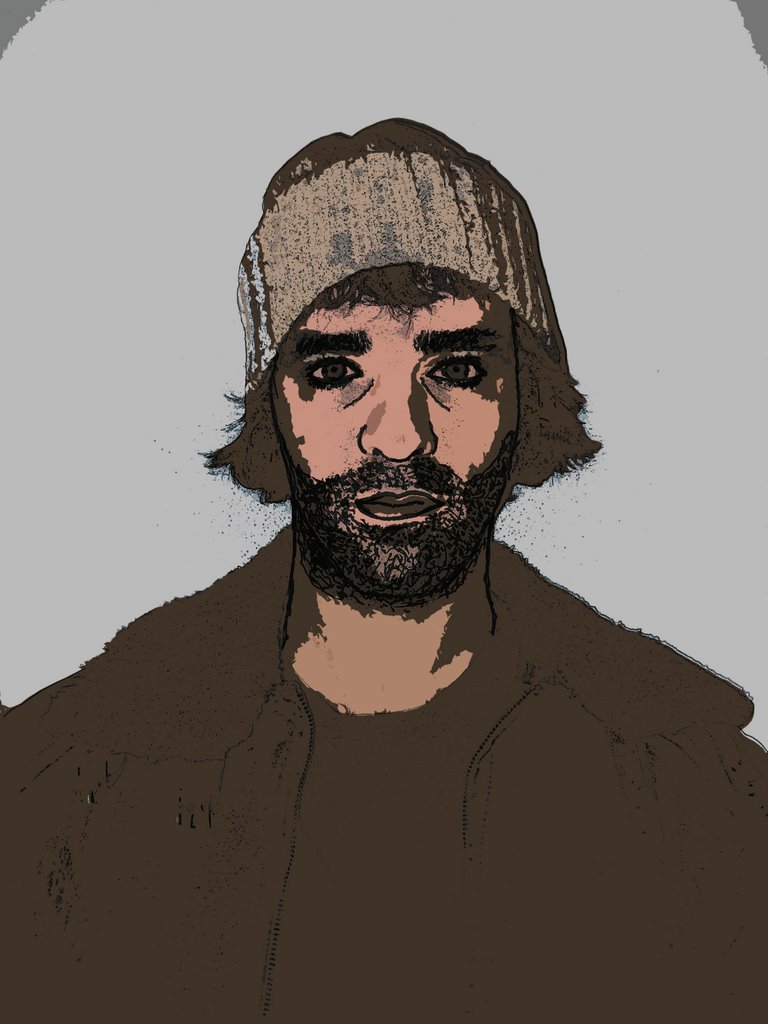
and applying the cutout filter in photoshop to him. This gives the toony ramp-like look that is used for toon shaders...

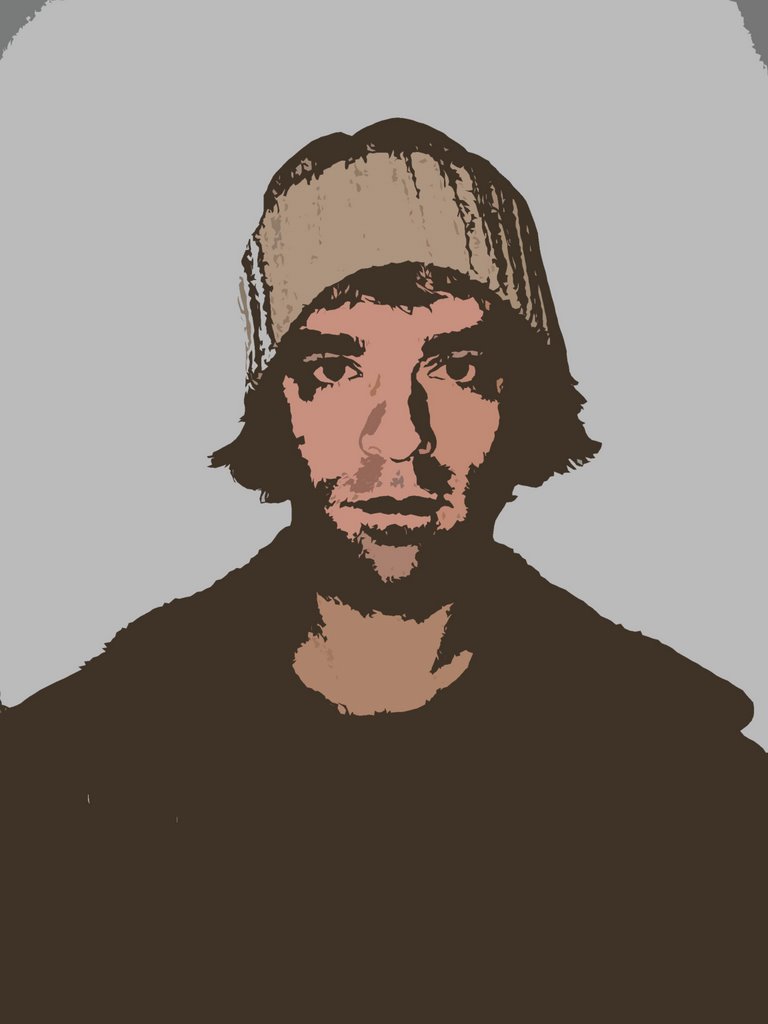
however, the borders here are based on actual changes in color on Justin's body, not from the light fall off of the scene. The first time I did it I used 8 levels, 4 for edge simplicity and 1 for edge fidelity. I decided to decrease the number of levels so as to up the graphic nature of the piece, so instead of using 8 I dropped to 2 to get

This is a really interesting iconic look and definitely has the grunge feel that I want. It does lose some of the subtlety of the image and definitely veers away from the Little Prince/Missing Piece innocence.
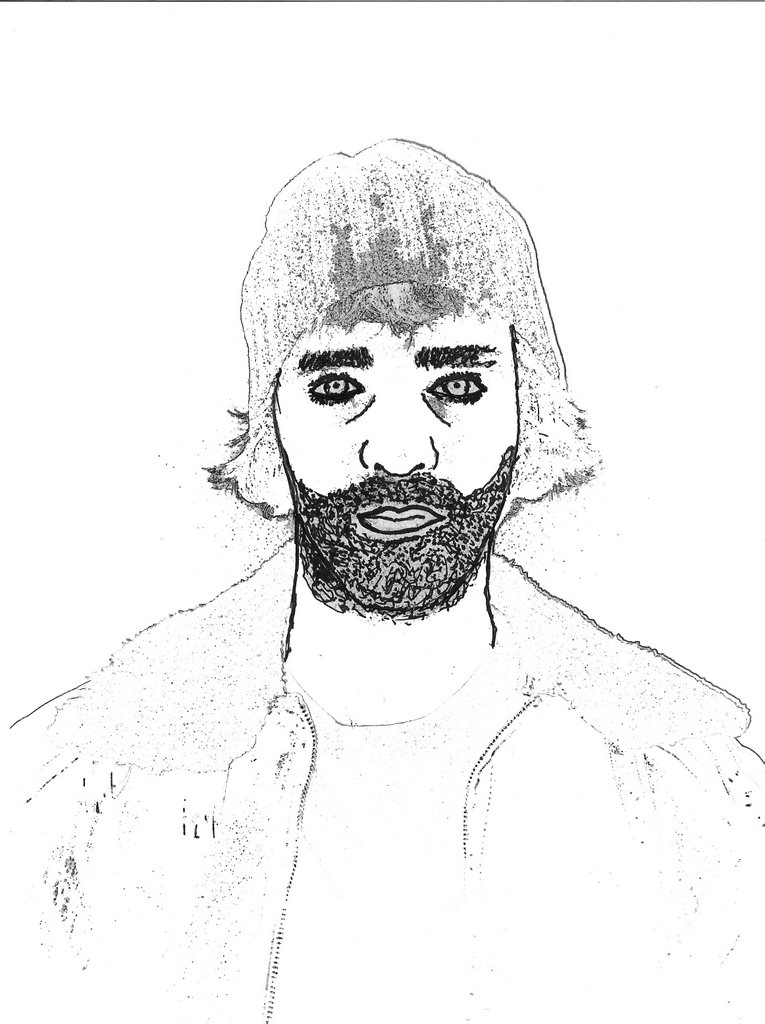
Meanwhile, I've been attempting to hone the drawn feel, and I've concluded that the best and seemingly only way to get a drawn look is to actually draw myself and scan in the image. So I used the Find Edges filter on the original photo of Justin and printed the image...then using a thin marker I inked the more important lines loosely to thicken them and add line quality. Afterwards I scanned the image in to get this:

Layering this on top of the most graphic image and using the multiply filter on this layer to blend them, I got a little closer to my goal of drawn textures...however, the drawing was too rough relative to the simplicity of the color layer so I applied the cutout filter to the drawing to simplify it a little. The result is below

This is starting to feel like something...as Lauren pointed out, the beard inking and the crease lines around the nose age him too much, so perhaps these should be left out...but this is starting to feel artistic and realistic and toony all at the same time, which is the goal. Maybe adding a layer between the background color and the line drawing of some sort of texture to break up the background a little and make it slightly more artistic and less graphic....hmmm

November 8, 2006

Post First Industry Review

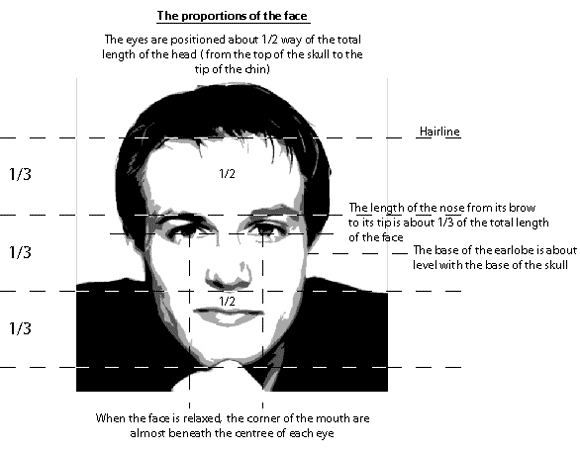
We met with Galen on Saturday and he seemed to like all the research I did (though Hosenfeld suggested I minimize the talk about research in the future). Galen's main comments were to figure out the style of the piece ASAP because that will determine how detailed the facial animation needs to be--as well as how humanistic it must be. If the face is divided in the normal human ratio--eyes halfway between chin and top of head and nose halfway between eyes and chin (see below image)--no matter how cartoony the texturing or other parts of the body, we read it as human and expect a high level of detail in the facial movement. I don't really think there is anyway around having Justin look human, so it means a lot of detailed blend shape work...perhaps all the time I've saved on rigging will go towards blend shapes and facial controls.


He did say that the long camera moves will allow me to complete the thesis as long as I focus on the detailed animation for close-ups and simpler, broad movements during the camera moves. I should consider the camera moves storytelling and the close-ups as the showcase of my character animation talent.
So this week I've begun to explore shading in Maya. I think I want to use toon outlines but with a more complex texture on the body, similar to the texturing I used for "The Temptation of the Elephant" (fourth one down on the page). I'm reworking laying out UVs, though I'm learning that I won't really learn how I want them exactly until I start building my texture.

November 1, 2006

Animattic Ver. 2

This week I introduced a camera rig into the animattic and worked on cutting between camera shots to alternate between large sweeping shots that reflect the song's pace and close ups for character animation focus. Some stylized camera work was added to enhance the dreamscape that is implicit in the music, the lyrics and the narrative. One such shot moves in to the first piece that lands in Justin's hands and pans up and over the piece, revolving and rising--intending to convey the fatalistic way the piece has landed in Justin's hands, the master plan that the universe has for us. As well, the shot subtly connects the piece to the one Justin is sitting on which is exactly the same shape.
I have yet to alter the animation of the protagonist to fix the puzzle-solving time issue. However, the worry I've had over building a good enough rig is gone once Leif and Nick suggested I merely skin my character to the Norman rig. This not only allows for more time to animate and less time building a rig but also means I can create at least a very basic animation within the animattic using Norman and import my character later and skin it to the rig. I can move to -100 on the timeline and keyframe Norman in the bind pose so that I can later go back and skin my model in the default pose. Of course I will still have to play with skin weights and perhaps adjust the proportions of my model or the rig to match, but theoretically a lot of time should be saved.
I have also reframed the animation to the 16x9 that seems far more appropriate for my piece. Enjoy!