January 31, 2007

References available upon request

Referencing

In the past couple days I have entered the land of references, building my scene files out so that I can begin to animate. I'm spending quite a bit of time on naming conventions and testing various aspects of my files to make sure that all the manipulating of files I will be doing is feasible. I've already dealt with quite a number of problems...

I began by reorganizing my scene files into subfolders, as below:


These folders (Animattic, Environments, Justin, and Master) allow me to continue working on the planet, its modeling, texturing and other environmental elements separately from remodelling and skinning Justin. I can, within a subfolder of each of these categories (as is visible in the Justin folder), continue to hone each element, saving regularly, and then resaving as the _Ref file when an element is completed and the file is clean (doesn't have extra Geo, Layers, Utilities or Shaders). The changes will ripple through the pipeline and when I open the Master_Ref file, everything will be updated.

Originally I was going to have separate files for each Shot so as to keep the files very light, however, this makes a couple things very difficult. I would have to animate linearly so that the end pose from shot 1 matches the beginning pose of shot 2, I'd either have to resave Shot 1 as Shot2 or copy all the numbers, which is a waste of time. Also, the one huge benefit of a camera rig is being able to playblast the entire piece very quickly. If I do all the animation in one file with separate cameras for each shot, I can always create a new camera, orient and point constrain it to all the cameras and key it so it jumps from shot to shot, allowing a quick playblast of all of my individual cameras. I can then delete and recreate this rig whenever I need to.

So, I've decided to do all the animation in one Master file, where the environments (the planet referenced twice as the Big and Small, and global sphere for the universe, as well as floating planet pieces throughout), and Justin (also referenced twice) are all referenced into one central file where all the animation exists.

Problems

The first problem I have come across during my referencing stint is with the IK/FK Switch script that is designed to allow seamless transitions from one to the other. Its a really useful script, and, like much of the Norman rig, a great thing to take advantage of since I have it.
After referencing Justin into my Master file I discovered that the script didn't work, causing a downward spiral of depression and self-loathing. No, but seriously--it meant I had to go back and figure out at which point the script stopped working. Fortunately, after some exploration, I discovered that none of my modifications to the rig were the problem, and since I was using distinct namespaces for each referenced rig, the reference wasn't the problem either. Unfortunately, something I expected to do very easily is now a problem--scaling Justin. Apparently, when the Placer is scaled it completely screws with the IK/FK script. I'd love to figure out how to fix the problem, but I have yet to attempt any rewriting of the script or creative grouping.

The real issue with scaling (in addition to the fact that I have two Normans that need to be scaled differently) is that the smaller the scene is the better--as Lauren pointed out, render times are exponentially faster the smaller the scene is--less calculation time for lighting, and the smaller the numbers, the less processing overall. So, I could potentially leave the small Justin at a scale of 1 so the switch would work, but that means that the planet is bigger and the big Justin is enormous. I probably won't need to use the switch on the big Justin since he basically holds a pose, however, then the scene is very large. My plan had been to make the large Justin at scale 1 everything else would be smaller. As of yet, I have no idea how I'm going to deal with this...

Moving along, I decided to take my camera rig and duplicate out each shot as a separate camera. In my hasty stupidity, this ended up taking many tries. I figured out fairly quickly that the duplicate options allows you to keep keys when duplicating. However, I discovered this using the Duplicate Input Connections box, which means that all duplicated objects share the same keys and deleting keys from one deletes them from all the others. After multiple attempts I realized this was the problem and changed to Duplicate Input Graph which creates a distinct set of keys (a distinct graph) for all duplicates, allowing modification without affecting the original.


So I'm currently at a crossroads where the cameras from my animattic are separated out and I can begin to get them set permanently. I'm a little unsure about the scaling issue but I'd rather sacrifice the IK/FK Switch and have lower renders, so for the moment I'm continuing as planned. I hope to set the cameras by the end of the day tomorrow so I can update my story reel with some beginning textures, my Justin rig thus far and some solidified camera movements and positions.

January 25, 2007

Editing Norman and Rigging Dilemmas

Editing Norman

In the past couple of days I've been on the Spline Doctors Blog where I've seen a bunch of uses of Norman remodeled to make various characters. Students at the Academy of Art in SF taking the Pixar classes have taken Norman and remodeled him a dozen times, as witnessed by all the characters below:


For one of their classes they have taken Norman and turned him into a space captain (below, top) for a short film the entire class is creating together, a clip of which is below.


and turned him into a space astronaut for the video below:


Rigging Dilemmas
Most of the characters use Norman's geometry and minimal remodeling, mostly of the face. However, a few of the characters are smoothly bound with single mesh geometry for the upper body. It seems that all of them have kept the legs as is, with a few creative flairs to hide the knees and make the lower leg into a boot. The one model that is completely smooth bound is the kid (shown with both blond and brown hair) and, as is obvious from the animator's website, Aaron Koressel built this character (Hordy) himself, whereas all the other characters are Norman.

To some degree I would love my character to have a uniform mesh as an upper body, however, it seems I would have to sacrifice some capabilities of the rig to make this happen. Here are my options:

1. Wrap Deformer
I could use a wrap deformer and wrap a single mesh to geo that is already skinned...however, this takes forever to render and wrap deformers are quite quirky...so moving on...
2. Rebuild/Reskin Geo
I could delete the upper body geo and build my own and reskin...however, the current geo is skinned to the bend bones which are the lowest level of skeleton and therefore respond to all the other parent skeleton systems. To get a smooth bind, I would have to skin the single mesh to a higher level of skeleton, causing me to lose bend bone and stretchy functionality. Plus forearm collapse and shoulder collapse is a worry, especially since the rig doesn't have extra joints built in to counter arm collapse
3. Blend shape
I've been using blend shapes fairly effectively, but the geo remains separate pieces...looking at the space captain above, it is possible to keep the geo as separate pieces and still have it look damn good--so perhaps I should continue along this path.
3a. Substitute Geo
I've discovered a skinning tool that allows you to swap geo that has exactly the same parameters as the one already skinned. Limitations are that it can't have blend shapes on it (so this can't be used with the face), and of course, that, as with blend shapes, there is no appending to the geo. However, because it is possible to smooth skinned geo and delete the non-deformer history, more detail is possible....
This option can be used in conjunction with the blend shapes, start with blend shapes and then delete them and just swap geo, this will minimize history.

After a lot of thought on the subject, I've decided to go with the third option. Since modeling and rigging are not my focus, I would rather minimize the time spent on them. As well, being that my piece is whimsical--the less realistic my character is, the better he will match his environment. So, instead of seeing the Norman rig's "rigid" bind as a stumbling block, I aim to play up and incorporate these elements into my remodeling. First off, I am a big fan of the patchwork look.. a la Sally the rag doll in Tim Burtons Nightmare Before Christmas. (below)


Unfortunately, patchwork generally has stitching across seams, not along them, so the idea of drawing stitching along the edges of geometry (especially since it separates) is not really a solution to my problem. I could play up the edges by using toon shader edges, something I'd been wanting to incorporate through previs. By drawing the textures in colored pencil and creating black outlines of all the geometry, perhaps I'll get a new twist on subtlety in the form of the hand drawn colored pencils, with in your face graphic art in harsh black outlined edges. I'll have to see how this looks with the Nose, Ears and Hair. Adding edges might have to be a selective thing so it doesn't overwhelm the character..
To be continued...

January 24, 2007

Face Texture

Images of Justin's face Texture:


Just Colored Pencil:


Posterized:


Posterized with Color Adjustment:


From the Side (same as Above):


I'm happiest with the last, but the stubble is too large, it should be dots, not strokes...and the lips are smeary and large, it looks like he is wearing lipstick...needs some work, perhaps a larger texture so I can go into more detail...

January 23, 2007

Further Skinning and Rigging Issues

Rigging
I've solved the eye issues---the rig includes a number of locators and clusters that control the eyelid deformation and they all have to be centered at the same place as the eye to work properly. So, in addition to detaching the head Geo with history on, moving the parent eye joint and reskinning the head so the eyelids didn't move with the eye, I also had to move locators and cluster pivots. All in all the eyes work fine, though the eye aim doesn't work anymore--I tried to realign the curves with the new position of the eyes, but the aim has a bunch of utilities built in that I couldn't figure out how to fix, and honestly, I should animate the eyes locally anyway.

Modeling
I've spent a lot more time on the face. I finished the hair modeling, added eyebrows and continued to tweak the eye sockets. They are far more almond-shaped now and look much more human. I made the nose a little less childlike by pulling the tip in a little so it doesn't look so much like a cherub. As well I pared back the cheeks some. Using my own advice I scaled the rig to get the head and hat/hair geo to have more depth and used that geo as blend shapes so the controls aren't scaled. I worked on the modeling of the upper body and the arms, as well as adding a hood to the sweatshirt he's wearing, with a pull cord. I've remodeled the pelvis and the thighs some the start to get pant-like legs instead of thin sticks. Below is a 3/4 shot of the model at the moment.


Skinning
I've worked on the skinning of the shoulders and am fairly happy with the result. There is a fairly smooth transition between the three pieces of geometry that merge at the shoulder--the upper arm, the shoulder ball and the torso. I'm a little worried that the intersecting geometry will look bad in renders, but I am hoping to give the texturing a very funky, stitched look. It will match the bohemian, hippie/skater style that I'm going for and hopefully I can get the stitching to fall along the edges of the various pieces of geometry. Below is an image of the back of the model with the shoulders in extreme positions. As well, the modeling of the hood is evident.


The problem I'm having currently is skinning at the elbows (and I am guessing I will have the same troubles with the knees, though I haven't tried to skin them yet). Because there are bendable bones built into the rig the arms are weighted to joints for the purpose of bending them. Instead of having a sphere as the elbow, I would rather weight the upper arm and forearm end vertices the same so that it becomes one continuous arm in the same way I skinned the shoulders. However, I'm having trouble figuring out which joint to weight the vertices to so that they move with the elbow. I've tried a number of the joints but none of them seem to do anything. I will have to keep experimenting...

January 16, 2007

PreSemester Progress

I've been alternating between modeling and texturing, I've had some progress and some setbacks with each.

Texturing:

The texturing is coming pretty well as a basic start, below is a quick render of the planet as it currently looks.


At the moment the image gets pretty pixelated when the camera moves in for close-ups so I'm going to have to scan the image at higher resolution. There is obvious faceting which doesn't seem to be solved by smoothing. The problem is solved by softening normals, however, because they are separate pieces, if I soften the edge normals the image fades to black along the edge and the individual pieces are obvious--this can be seen below.


I may have to do a visibility switch where I use a sphere for the end when the camera pulls out. The faceting shouldn't be an issue for the small pieces the smaller Justin manipulates, so a visibility switch won't be necessary.

Modeling:

As far as modeling Justin goes, I've been tweaking the face, smoothing out the cheeks and softening the chin. I also imported the ears I created for my original model of Justin and replaced Norman's ears. I created a hat/hair piece and am in the midst of extruding faces to make his hair stick out. He's looking more and more like a human and like Justin, which is encouraging.

I'm having some trouble with the body--unlike the head which is skinned to only one joint, the body is skinned between joints and it seems that adding a blend shape doesn't deform the geometry fully.--Just solved the problem...Because I smoothed the geo after it was skinned, there was unnecessary history active, so I deleted the nondeformer history, recreated the blend shape at front of chain and it works!

The one issue I'm still having is with the eyes. The twist controls on the eyes are on the parent eye joint, which i never moved, so the eye is rotating around an external pivot. This seems to be the issue with the lid twist controls as well. Still trying to figure out what to do about this...

Here's a screenshot of the model at the moment:


Also, it seems that I've discovered the reason the mouth flapped open and closed when rotating the head last semester--scaling the head control does it. I noticed that the head is very flat from front to back, as is obvious in the side view below.


I attempted to scale the head to fix the problem but I guess since scaling the head control scales the other controls, somehow distortion occurs and the geometry gets deformed bizarrely.

An easy solution to my problem is to duplicate the geometry while the head is scaled to the shape I like and use this new stretched geometry as blend shapes.

January 10, 2007

Mindful of additional inspiration

As I plunge into thesis land, I've begun to notice aspects of other media that are good examples for me to follow, and reminders of some of the ideas I've come up with to solve the complexities of the work ahead.

Sdrawkcab Krow (Work Backwards):

A video that is circulating the internet (below) and available on "YouTube" shows Michel Gondry, the music video master, solving a rubik's cube with his feet. As with most Gondry videos, it is an illusion of trick editing. In this case he took a solved rubik's cube and used his feet to mess it up and then played the video backwards--with some sound editing and cutting, the video is pretty convincing aside from a few odd quirks that are pointed out by the user "BeyondBeliefMedia" in his video "How Michel Gondry Faked His Rubik's Cube Stunt".


The video points out the concept of making sure the puzzle is solved by working backwards. I expect this idea will be invaluable in having Justin solve the puzzle ball--by starting with the final pose of the just completed puzzle and working backwards, I can make sure the puzzle is solved successfully and in a convincing manner.

Near and Far:

While watching "The Little Mermaid" the other day I was reminded of a concept I have been developing to minimize the amount of animation necessary while still being able to convey the video and complete the piece. I have been planning to intercut between close-ups of Justin with the puzzle ball with wide, sweeping shots of the entire planet to alternate the focus from detailed, convincing animation to storytelling and expressive camera movement. Disney did just this--I bet--for the same reasons, and its very evident during "Under the Sea" (below). The close-ups allow for really nuanced movement and lip sync which keeps the audience aligned with Sebastian, while the wide shots allow far simpler animation of Sebastian and shows the performance of the other fish, fulfilling the narrative purpose of the musical number.


Dreamweaver:


To some degree I intend this video to function as a dream sequence...a place where fate seems to have a way of directing everything that happens. I'm currently reading "Neil Gaiman's" "American Gods" and a comment he makes about "dreams" stuck with me as a great way to word the "dreamworldly" quality I hope to create within the video:

"It was a dream. and in dreams you have no choices: either there are no decisions to be made, or they were made for you long before ever the dream began."
(p. 303)

January 9, 2007

Parallel Pipeline Setup & UV Layout

As hard as it is to get back into the swing of things with the holidays only recently gone, I am attempting to focus on getting the preliminary setup done. And, if I use references for the rig and the planet, I can continue to update modeling and texturing for both as I'm animating, creating a sort of parallel pipeline where I can alternate which aspect I work on without affecting the others. Of course, this means some setup is required--i.e. laying out UVs, applying basic textures to make sure the look is basically what I want and some basic modeling to make sure the blend shapes don't ruin the skinning or the other facial blend shapes. So I've begun to do the UV layout for the planet, which is coming along, but is far more time consuming than I imagined...in addition to having to select all the outer faces of each piece to create one spherical projected UV map for the outer shell of the planet, I also have to have separate planar projections for each internal plane and layout all of these relative to each other within UV maps for each piece. Fortunately, my scripting knowledge has come in handy, so for the outer shell I created a Quick Select Set and wrote a two line code to add additional faces to the set:

{
string $x[] = `ls -sl`;
sets -edit -forceElement FacesSoFar $x;
};

This way I can create a Quick Select Set, and then select outer faces for each piece individually (with the others hidden) and add those faces to the set.
This makes it far easier to make sure no internal faces are in this set.

In total it has taken me two days to layout all the UVs for the planet pieces. Below is an image I created in photoshop, using UV snapshots of each piece and then I colored them relative to their original color (see post "Constructing the World" for photo of actual puzzle ball). Using a printout of this UV Layout I intend to draw in colored pencil the texture map for the planet. Instead of offsetting the image in photoshop and having to edit the edges to allow for tiling, I will fold the drawing and draw across the border to prevent seams.


I have also completed laying out UVs for the inside surfaces of all the pieces, however, it remains to be seen whether they will need some tweaking when I attempt to draw their images. Below are the UV maps for the six pieces.


As far as setting up referencing, I intend to use the animattic scene from my previs since it already has basic camera movement setup...However I will have to delete the rig and the planets because I need to import the new files I've worked on as reference. (I was hoping to just transfer UVs for the planets but the pieces had some extra faces that I hadn't noticed, which required some changes in geometry, so I will have to start over with that...oh well).

January 4, 2007

Back to work - Modeling Technicalities

After a brief break for the holidays, I'm back to work, aiming to stay on top of my production schedule by completing modeling and texturing before the semester begins. My preliminary issues are how to model and texture Justin when the Geo is already skinned. Lauren discovered a great texturing trick during her thesis where you can layout UVs on a duplicated version of a piece of Geo and transfer to the original as long as they are exactly the same in terms of number of vertices. Within the Modeling Menus, under Polygons --> Transfer there is an option to transfer UVs. So I can use all of the blend shape Geo I will be building to lay out the UVs of the skinned Geo. As for modeling, the biggest issue is making sure not to ruin the facial blend shapes. With the kid I modeled for character 2 moving the eyes ruined the main Lid controls. I had moved the joint itself, which Leif had seemed squeamish about. So this time I unlocked the translate of the eye control and moved the eye control--something I had tried originally with the kid, but didn't seem to work. I'm realizing the reason this doesn't work is for eye rotation because the center of rotation is where the joint is, not the control...so when I move the eye aim or rotate the head the eyes pop out of the head---I guess I will have to move the joints themselves.

The issue with moving the joints is that there are 4 joints for each eye, making it kind of complicated to determine which to move. There is an EyeArea joint that has the innermost eyelids bound to it so that for extreme movement, the eyes can pop out of the head and still be attached to the skin. Because of this skinning, I can't move any parent joint of the EyeArea joint or the Geo will be affected. So the only joint I can move is the jntRig_Rt_Eye (& JntRig_Lf_Eye). This is the joint I ended up moving in the kid last semester which for some reason ruined the basic eyelid controls. After moving the joint now the eyelid controls still work, so I'll have to check periodically and make sure moving this joint isn't the problem.

December 6, 2006

Pulling it all together


First off, here as an inspirational image called Sadness I found doing a google search for "sad man"--the photo is a part of a series on "Flickr" called "Man on the World" by "Azchael".
I stumbled upon this image while searching for the emotions I want to express in my piece and its amazing that this model with no facial features truly conveys sadness and an introspective quality exactly like the feeling I want for the beginning of my piece. Its just a reminder that body position conveys a lot and the face can amplify the emotion, but is an added bonus, not the only, or even most important tool to get emotion across.

In pulling together all of my storyboards, research and source images, I realized that the best way to really nail down how my story happens, namely how Justin puts the pieces of the puzzle together is to do a videomatic where I film myself with the music playing getting the pieces at the right time and actually construct the puzzle. This should indicate whether there is enough time for me to construct the puzzle with a little bit of difficulty built in. As well, it will be great reference for creating interesting poses throughout the piece. In addition, for my storyboards it seemed important to indicate all the changes in emotion so I searched for facial expressions and found the following two face charts:

I decided to use the one on the left and to indicate the intended expression for each storyboard by pasting the corresponding face in the corner. This way I have additional information to pull from my storyboards without having to redraw them.

After meeting with Michael on Monday I have compiled a list of what I have left to do for next week. Here goes:

Videomatic --> Shot Sheets (+ shot 0) Tasks
Production Schedule
Style frame/Mood boards
Introduction
Research Paper - Image list (w/fig numbers on images)
Add Journals to the end


First I need to create a videomatic, which will inform redoing my shot sheets (including adding in a shot 0 which is all the modeling, texturing, rigging...everything I need to do before animating). My shot sheets should list my tasks, i.e. what motions the character will go through in each shot so I can estimate the amount of time it will take to animate. For example, in the first shot, a long slow pull in to Justin sitting on the rock looking forlorn. He will stay basically in the same pose--a head on the hand sort of thing, like the image at the top of this post, and maybe he will take a deep breath and let it out, exasperated.

Once I get all this done, I need to create a production schedule in the form of a Gantt chart that breaks up all my tasks by shot and allots time to do everything.

I need to create some more Production Design in the form of a style frame--using Richard's drawing, adding in color and a background. Maybe a mood board too.

Finally I need to throw an introduction to the whole thing at the beginning, add an image list into the paper and copy this entire journal to the end of the paper.

November 29, 2006

Meeting with Richard Bailey

Before class I met with Zeth's friend Richard Bailey and he quickly drew up some really nice images based on the photo I have of Justin.


I had already decided that I would not build a rig and instead use the Norman rig given to us for Character 2, and now, looking at these drawings, I have decided to scrap the model I built of Justin and instead really stylize him based on these drawings. I hadn't believed that the proportions could be pushed so far and still resemble Justin so much, but its all about keeping some of the features--shape of nose, type of hair, hat...etc. So it looks like I have quite a bit more work ahead of me than I had originally planned. Oh well, c'est la vie.

November 22, 2006

Putting together a puzzle
during a meteor shower


Okay, here's a new snag. After completing my second animattic I've realized that there is no way Justin can assemble the entire puzzle ball between the 2nd meteor shower and the end of the song...its about a third of the entire piece--maybe if he knew exactly how the pieces fit together this would work, but the whole point is him exploring these pieces and figuring out how they fit together.

Brainstorming Ideas:

The Texturing Solution:
Unlike the original puzzle ball which has completely random solid colors so that the pieces don't relate, if I texture the ball as a solid piece (a la the soccer ball assignment) then it will be far more obvious how the pieces fit together. This still doesn't solve the timing issue, but its a start.

The Timing Solution:
Instead of having all the pieces fall during the 2nd meteor shower, they could fall progressively, one after another (in the right order, even) which would allow a little time for Justin to interact with the new piece and to figure out how to fit it in to the growing orb.

The Hosenfeld No-gravity Idea:
As Hosenfeld astutely pointed out--this is outer space--there doesn't have to be normal gravity. I had already been picturing duplicated versions of the pieces I've built floating around in outer space to fill out the environment somewhat. In addition, the pieces don't necessarily have to fall to the planet, they could merely float by. This makes the border between fate and chance a little blurrier, so I'm thinking perhaps I will have pieces float around, but not the ones he interacts with. (Another good idea from Hosenfeld--have a piece or two float right in front of the camera, really bring the camera into the environment)

Issues:
These are all good ideas and can be incorporated together to work as a whole, however, the timing solution breaks up the three distinctive meteor showers that I had occurring at the beginning of each stanza. I really like the visual structure of these showers...the repetition of three...the progression from medium to heavy to light. Somehow I have to integrate pieces falling in a paced manner--ideally in relation to the song--while still having three distinctive showers. As well, how the meteors in these showers interact with the asteroid fragments floating in space needs to be addressed.

November 15, 2006

Texturing Trials

So this week the focus has been on texturing the piece...and I've started to brainstorm how to get the look I want. I started by taking the image I have of Justin (below)

and applying the cutout filter in photoshop to him. This gives the toony ramp-like look that is used for toon shaders...

however, the borders here are based on actual changes in color on Justin's body, not from the light fall off of the scene. The first time I did it I used 8 levels, 4 for edge simplicity and 1 for edge fidelity. I decided to decrease the number of levels so as to up the graphic nature of the piece, so instead of using 8 I dropped to 2 to get

This is a really interesting iconic look and definitely has the grunge feel that I want. It does lose some of the subtlety of the image and definitely veers away from the Little Prince/Missing Piece innocence.
Meanwhile, I've been attempting to hone the drawn feel, and I've concluded that the best and seemingly only way to get a drawn look is to actually draw myself and scan in the image. So I used the Find Edges filter on the original photo of Justin and printed the image...then using a thin marker I inked the more important lines loosely to thicken them and add line quality. Afterwards I scanned the image in to get this:

Layering this on top of the most graphic image and using the multiply filter on this layer to blend them, I got a little closer to my goal of drawn textures...however, the drawing was too rough relative to the simplicity of the color layer so I applied the cutout filter to the drawing to simplify it a little. The result is below

This is starting to feel like something...as Lauren pointed out, the beard inking and the crease lines around the nose age him too much, so perhaps these should be left out...but this is starting to feel artistic and realistic and toony all at the same time, which is the goal. Maybe adding a layer between the background color and the line drawing of some sort of texture to break up the background a little and make it slightly more artistic and less graphic....hmmm

November 8, 2006

Post First Industry Review

We met with Galen on Saturday and he seemed to like all the research I did (though Hosenfeld suggested I minimize the talk about research in the future). Galen's main comments were to figure out the style of the piece ASAP because that will determine how detailed the facial animation needs to be--as well as how humanistic it must be. If the face is divided in the normal human ratio--eyes halfway between chin and top of head and nose halfway between eyes and chin (see below image)--no matter how cartoony the texturing or other parts of the body, we read it as human and expect a high level of detail in the facial movement. I don't really think there is anyway around having Justin look human, so it means a lot of detailed blend shape work...perhaps all the time I've saved on rigging will go towards blend shapes and facial controls.


He did say that the long camera moves will allow me to complete the thesis as long as I focus on the detailed animation for close-ups and simpler, broad movements during the camera moves. I should consider the camera moves storytelling and the close-ups as the showcase of my character animation talent.
So this week I've begun to explore shading in Maya. I think I want to use toon outlines but with a more complex texture on the body, similar to the texturing I used for "The Temptation of the Elephant" (fourth one down on the page). I'm reworking laying out UVs, though I'm learning that I won't really learn how I want them exactly until I start building my texture.

November 1, 2006

Animattic Ver. 2

This week I introduced a camera rig into the animattic and worked on cutting between camera shots to alternate between large sweeping shots that reflect the song's pace and close ups for character animation focus. Some stylized camera work was added to enhance the dreamscape that is implicit in the music, the lyrics and the narrative. One such shot moves in to the first piece that lands in Justin's hands and pans up and over the piece, revolving and rising--intending to convey the fatalistic way the piece has landed in Justin's hands, the master plan that the universe has for us. As well, the shot subtly connects the piece to the one Justin is sitting on which is exactly the same shape.
I have yet to alter the animation of the protagonist to fix the puzzle-solving time issue. However, the worry I've had over building a good enough rig is gone once Leif and Nick suggested I merely skin my character to the Norman rig. This not only allows for more time to animate and less time building a rig but also means I can create at least a very basic animation within the animattic using Norman and import my character later and skin it to the rig. I can move to -100 on the timeline and keyframe Norman in the bind pose so that I can later go back and skin my model in the default pose. Of course I will still have to play with skin weights and perhaps adjust the proportions of my model or the rig to match, but theoretically a lot of time should be saved.
I have also reframed the animation to the 16x9 that seems far more appropriate for my piece. Enjoy!

October 25, 2006

Animattic Ver. 1

Here is a first attempt at my animattic. Taking the visual script poses I stretched them out relative to the music and animated a single camera to move through the scene. After moving the poses to relate to the music I have discovered that the majority of my poses are for the second half of the song which poses two problems. First off, I need to come up with actions for Justin while he only has the single piece. This shouldn't be too hard, he can spend a good, long time inspecting and becoming familiar with the piece as it is supposed to become his friend. The second problem is a far more significant one which is that the entire puzzle has to be put together roughly within frames 2800-3500. This is about 30 seconds. Unfortunately this leaves little room for him to have difficulty with the puzzle, attempting to connect various pieces. While it should be fated that he solves it, it is very important that it isn't simple...it should be a bit of a trial. The plan is to have the texturing on the outside of the pieces match each other, so this could help make the puzzle easier than with solid colors that don't correlate. 30 seconds is still not much time at all. Perhaps I can figure out someway to repace the animation...hmmm...a problem that still needs a solution. In addition, I need to use a camera rig and introduce cutting.

October 18, 2006

Paper Due and Visual Script

I wrote my paper for this week and instead of redrawing my storyboard for the visual script portion, I took the Norman rig we are using in Character 2 and posed him with the asteroid pieces to create a series of images to begin moving towards an animattic. If I can get the timing of the action synchronized with the song then I can begin blocking out the animation and the camera movement.

October 11, 2006

Research Paper

With the research paper due next week I've taken all the materials I've accumulated and begun to organize them into the different categories of technical, artistic and cultural influences.

Cultural
The music video research I've conducted falls into the cultural along with ideas I've gotten from books including The Missing Piece

Le Petit Prince

and the movie Hedwig and the Angry Inch


Technical
The construction of the video should truly relate to the song itself, so using reference from one of the best video directors out there, Michal Gondry, I have worked on honing my narrative so that it reflects the musical structure of the song. His video for Star Guitar by The Chemical Brothers constructs a landscape that responds to the beat and complexity of the music.

Even more rooted in the structure of the music and the repetitive nature of choruses interlaced with verses is his video for Come into My World by Kylie Minogue in which she begins the video by exiting a dry cleaner’s and walks a full circle to the same dry cleaner’s during the course of the first verse. When she returns to the spot she began the same Kylie that exited the cleaners initially exits behind the one the camera is following, so she is doubled. Everything around her is doubled too—all the people on the streets and the items with which they are interacting.


Artistic
This section should contain styles I have studied that are influencing the aesthetic of the piece. I've studied a bunch of animated videos from the classic 2d look found in videos like Pearl Jam's Do the Evolution

to more stylized and caricatured looks like in the Beatles movie Yellow Submarine

to even more cartoony animation like Tenacious D's F**k her Gently

as well as a more simplified look, like an independent video by Laith Bahrani, creator of Monkeehub. The video is to Radiohead's acoustic version of Creep and has a pretty cool look to it.

The few that I really like in terms of style are Drive by Incubus in which footage of the band is intercut with the lead singer drawing himself and the other band members. I really like the hand-drawn look and the quality of the line, though its not as caricatured as I want, the look is very realistic--the drawings match the footage exactly as is obvious in the crossfades.

The video that really has the look I want is the Gorillaz Feel Good Inc. which moves from their 2d look in previous videos to a 3d toon shader look. It might be a little complex for the time I have, but its an awesome looking video.


This is a good bit of research to start with and I think serves as a good outline to springboard into the full-fledged paper.

October 4, 2006

Music Video Research

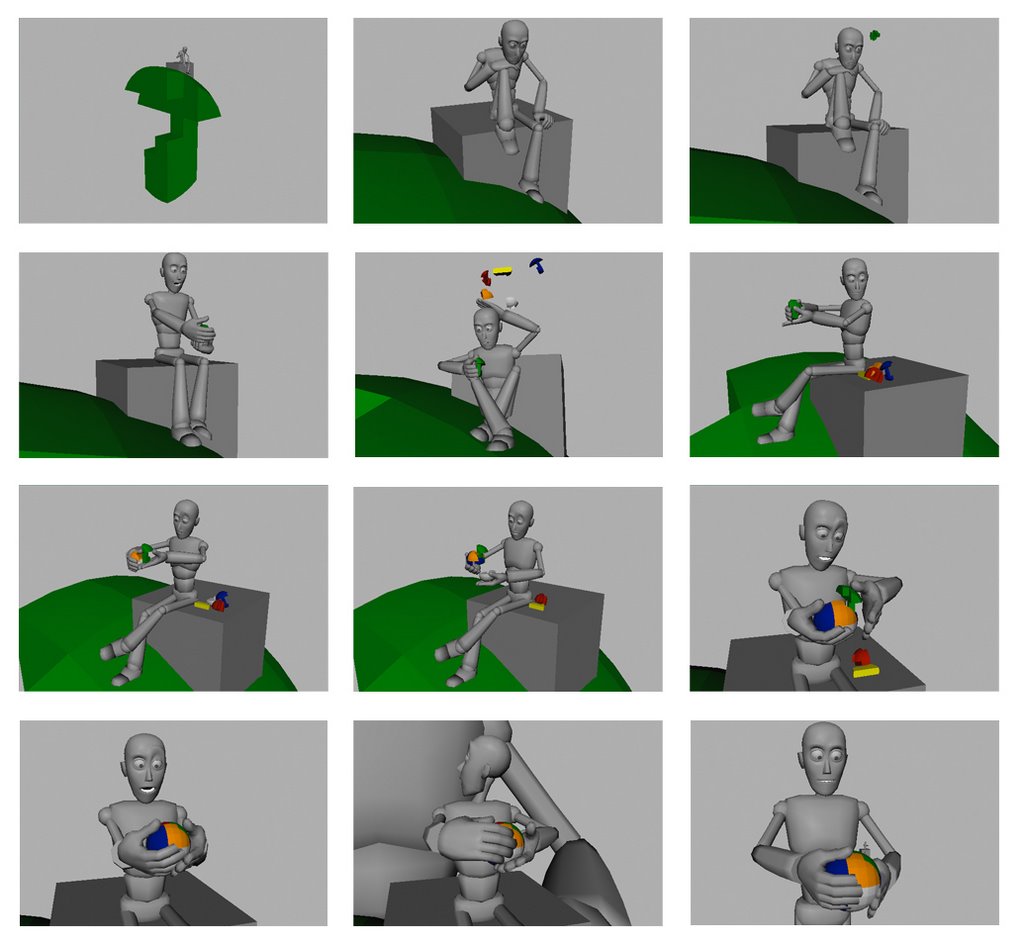
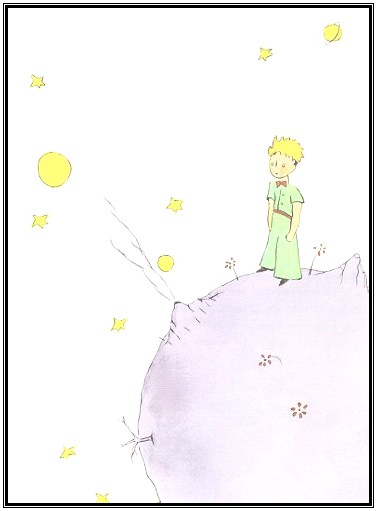
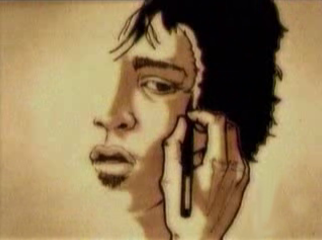
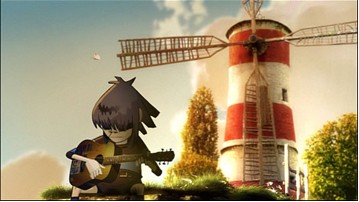
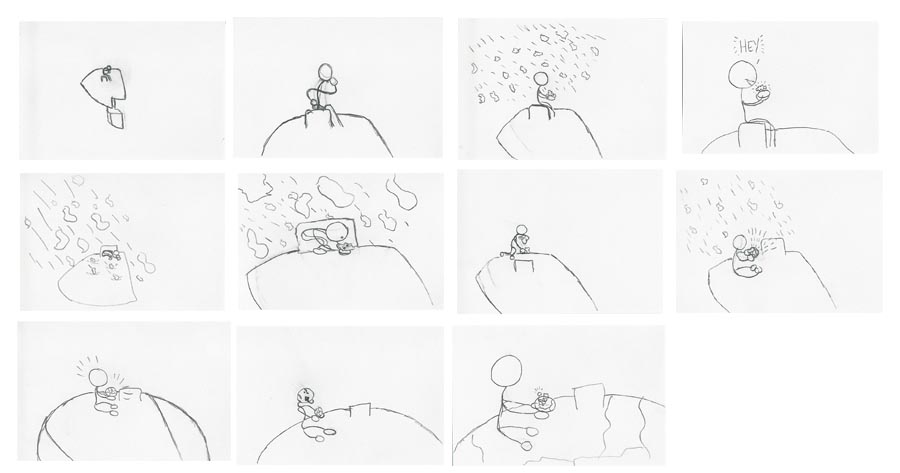
To begin, here are some inspiring images of the little prince:


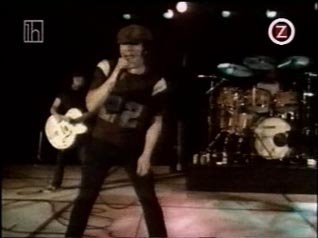
Now I turn to music videos for inspiration. Originally music videos were literally filming of the music. The video would be live concert footage pieced together from various camera angles. ACDC's Back in Black is a pretty standard example:


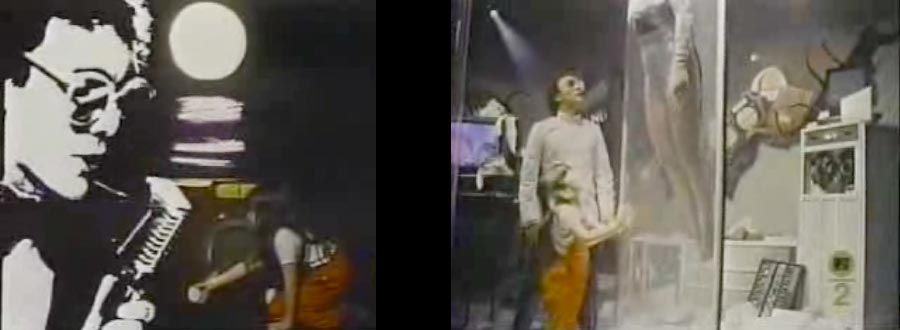
From very early music videos began to incorporate effects to enhance the visuals. The first music video to be shown on MTV was The Buggles' Video Killed the Radio Star which, like many videos to follow, used manipulated overlapping footage and explosions as well as extensive costuming for a surreal, fantasy look:


So, from the onset, music videos have incorporated effects work to enhance their look and to explore concepts visually that wouldn't be possible solely from capturing film.


From perusing a large number of videos it is readily apparent that they fall into a few very specific categories.

CONCERT/PERFORMANCE FOOTAGE:
As mentioned before, there are the concert footage videos like ACDC's Back in Black or Queen's 
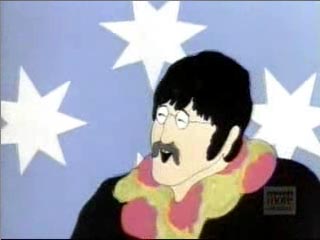
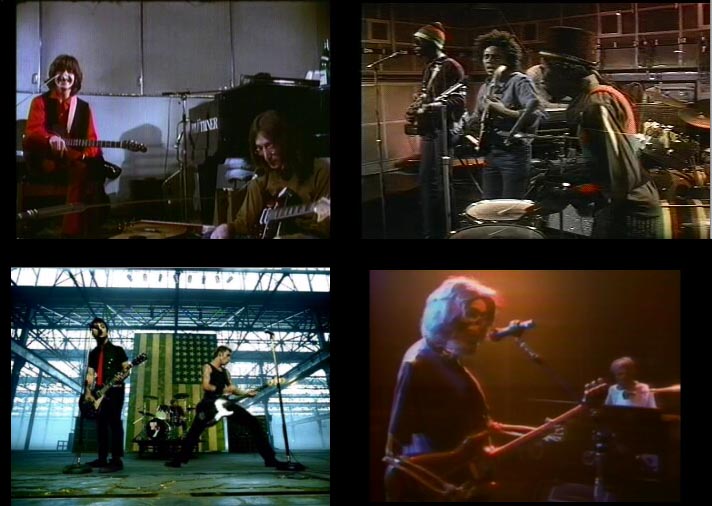
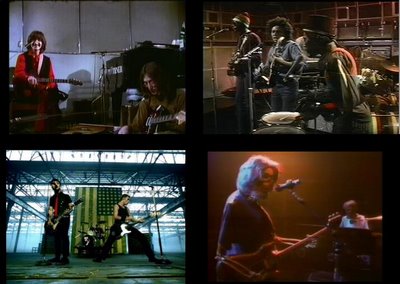
We are the Champions. In some cases this concert footage is all that exists as the artist died and never created formal videos. As well, songs that were recorded before music videos were being created have since had concert or performance footage added to create a video. This is the case with Bob Marley songs and some Beatles classics (below, top). Currently, some bands choose to create a performance video where there is no audience, or a cast of extras standing in for the audience, and everything is planned out in a much more stylized way, with fancy camerawork, high quality film, and a very specific set and look to the performance. Green Day's recent 
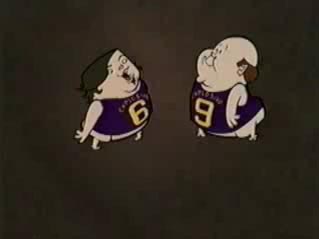
American Idiotis a good example (below left). Sometimes bands stick to the concert format, but get creative and incorporate the lyrics in a visual way. The Grateful Dead did this with Touch of Grey by filming a concert and intercutting footage of skeletons playing the instruments. The lyrics discuss getting older, so the skeleton motif brings up mortality (below right).
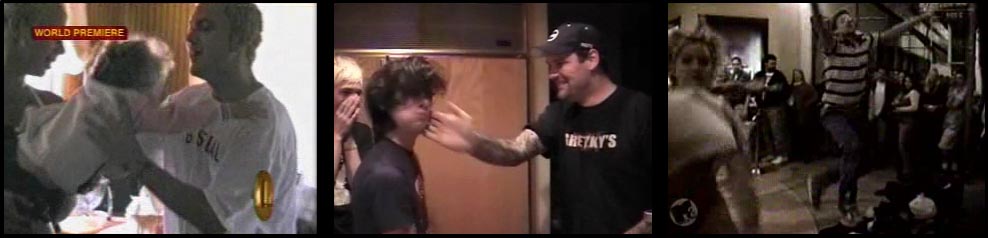


HOME VIDEO:
Like concert footage, home video footage is sometimes used to make the video feel like a personal display of one's life, cut together to reflect the message of the song. Eminem's Mockingbird is all about providing for his daughter and the footage used is all home videos of his daughter (below left). Home video footage is also used to show how edgy a band can be. The Used's video A Box Full of Sharp Objects integrates concert footage and home video footage of the band messing around to give a sort of wreckless tough persona to the band's hard rock song (below middle). The edginess of home video can also be interpreted in a comedic way, such as in Fatboy Slim's Praise You where a performance by a (seemingly untrained) dance troupe to the song has become the video (below right).


NARRATIVE:
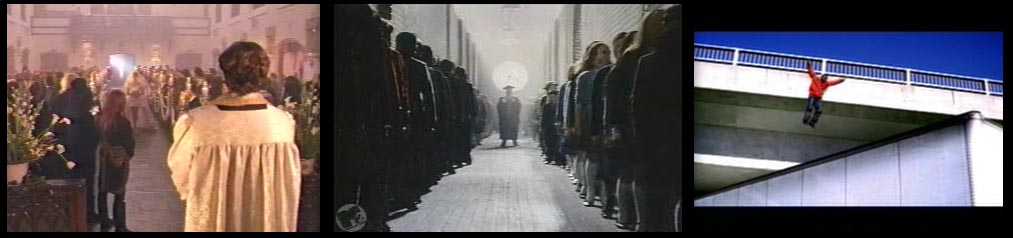
Narratives have been used extensively in music videos. Usually the narrative reflects the meaning of the song or enhances the potential meaning more abstract lyrics could contain. Usually the band/singer performing is incorporated as a parallel to the narrative and the video cuts between the two. As well, like short films and commercials, these narratives usually have a twist at the end that either turns the meaning of the video on its head or ties together a seeemingly meaningless video in a meaningful way. Guns and Roses' classic 
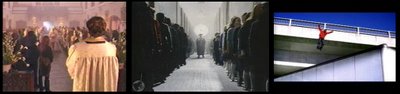
November Rain is an example on a large scale. The band performs the song with a large orchestra in a concert hall and the narrative is of a wedding, the wedding party, which is rained out. The twist is that the rained out wedding party becomes an omen for the bride's death, whose funeral follows. Scenes from earlier of Axl Rose (lead singer and front man) alone in bed which had meant hesitation about the wedding are now revealed as the present and all the cut together images of the wedding and funeral are his bad dreams from the past (below left). Pink Floyd's hit 
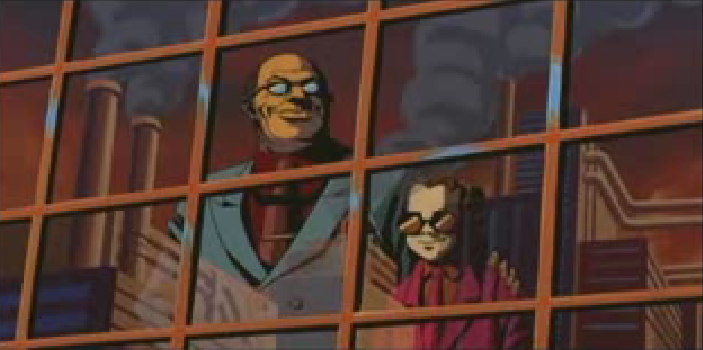
Another Brick in the Wall places children on production lines being force fed information at school. Referencing Fritz Lang's Metropolis, the students walk robot-like in and out of the classroom/factory where they are machines for society's consumption. The video goes as far as to have them fall through a meat grinder, pumped out as strings of ground beef (below middle). Shaggy's It wasn't me is a good current example where Ricardo "Rikrok" Ducent who collaborated on the video is caught by his girlfriend with another woman and goes to Shaggy for advice (below right).


MOVIE MUSIC VIDEO:
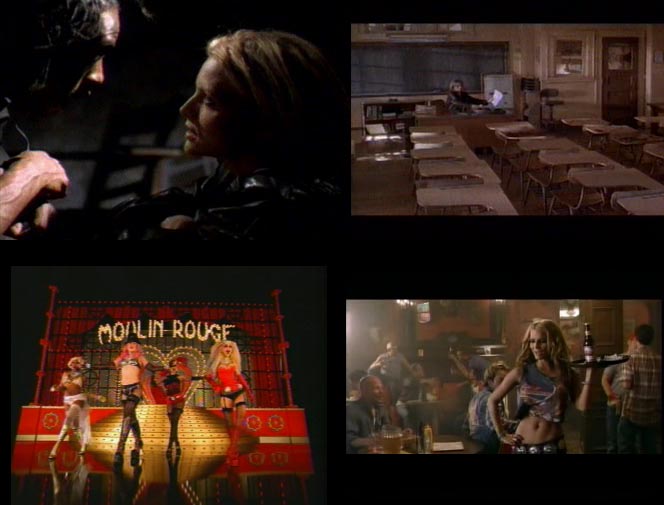
The movie music video is a specific kind of narrative music video where the video is being created in conjunction with a film. Usually the video is filmed in a location that relates to the film. As well, the film is referenced either by having footage from the film is intercut into the video as the narrative, or the actors participate in the video to make a more seamless whole. Some videos do a little of both. Such is the case with Coolio's Gangsta's Paradise which was used in Dangerous Minds. The video begins with Michelle Pfeiffer asking Coolio, "You want to tell me what this is all about?" Coolio proceeds to sing to her about the difficulties of his life. Later in the song scenes from Dangerous minds are cut in to the video footage as well (below top). Sometimes the film is only referenced by the setting, which is the case in Lady Marmalade done as a collaboration by Pink, Christina Agulera, Mya, Lil Kim and has a cameo from Missy Elliot. The song was a cover of the original by Labelle and was used in Moulin Rouge. As opposed to using film footage, the video is shot in the Moulin Rouge style and focuses on the singing talents. However, explicit reference is made to the film by having a sign reading Moulin Rouge in the background of much of the video (below left). Once in a while an unusual example occurs, which is the case with Jessica Simpson's remake of Nancy Sinatra's These Boots Are Made for Walkin' for the recent Dukes of Hazzard, an updated version of the classic tv show. Jessica Simpson plays Daisy Duke in the film and is also a pop singer so the video simultaneously contains the singer and an actress in the film without even having to integrate any of the film footage, so it doesn't. The setting is a western bar, an appropriate setting relative to the film's theme, and there is even a cameo by classic country singer Willie Nelson. She does drive up to the bar at the beginning of the video is the Dukes of Hazzard orange 1969 Dodge Charger, however, aside from that, the film is only referenced by the setting and the fact that Jessica Simpson is in both (below right).


THEME:
Theme is a sort of subset of narrative where there is no real story that occurs, just a setting. Really, videos fall on a spectrum between narrative and performance, and the theme videos are somewhere in the middle. Even in narrative videos there is usually some performance--what it comes down to is how much of the video focuses on the singer singing or the band playing versus and intercut narrative. If not much room is left for a narrative it can't be very fully developed and becomes a theme. A good example of a video that integrates both performance and narrative is Bon Jovi's It's My Life in which the band is performing in a tunnel and a girl who is at the concert calls her boyfriend and tells him to hurry up and get there. The rest of the video cuts between the band playing and the boyfriend racing to get to the concert. This video really does have a narrative, but because there is such a strong focus on the performance, and getting to the performance is the narrative, its far simpler than earlier examples of narrative. Nirvana's Smells Like Teen Spirit is an even simpler example in which Nirvana performs in a high school gymnasium. They perform with cheerleaders holding pom-poms and students sit in bleachers. Intercut are shots of a janitor mopping the floor. There really is no story to the video, just the concept of teen angst as a result of being penned up in school.

BALLAD/SERENADE:
The ballad/serenade is another form of themed video where the artist merely moves through their environment singing their song. Unlike a band which is restricted in movement by their instruments, a singer is unbound and can move around while they sing. The Verve's Bittersweet Symphony is a good example. The lead singer walks down the street and, in frustration bumps into people as he passes by. Its a form of a theme but the focus is on the individual moving through an environment and interacting with it, unlike the more basic themed videos where the band is situated in an environment and doesn't interact with the surroundings.

DANCE:
Many videos, especially since Michael Jackson's breakthrough choreography began, are formed around dance sequences. Jessica Simpson's These Boots are Made for Walkin'-referenced earlier-contains a choreographed dance sequence. For many artists the focus is their ability to dance while they sing, so the narrative revolves around the dancing. With Jackson's creativity and financial backing his videos are the epitome of being able to tell stories while he dances. In Smooth Criminal he weaves his way through a sleazy nightclub of criminals and gangsters, surviving on his dancing ability. In Thriller a mini horror film occurs where ghouls climb out of their grave at the witching hour and turn MJ into one of them, at which point they all hunt his girlfriend. Most dance videos are far simpler, such as Usher's Yeah! where the focus is mostly on his dancing in a nightclub-like setting.

EFFECT:
Some videos are created using a specific special effect and that becomes the focus. Sometimes this is because a famous director is hired and they have a specific concept in mind. Many videos that Michal Gondry creates are effect heavy, such as Kylie Minogue's Come into My World in which she walks around a city block and every time she comes back to where she began a new version of her emerges from the same door she came out of originally. At the same time duplicates of everything she passes occur as well. There really is no story other than the creativeness of the idea and the optical illusion it poses. Nine Inch Nail's Only is similar. It films a desk on which sits a pin-art that comes to life and shows Trent Reznor singing the song in the pin-art.

SPOOF:
The king of the spoof video is "Weird" Al Yankovic who takes his spoof songs of famous pop songs such as Gangsta's Paradise by Coolio and Bad by Michael Jackson--Amish Paradise and Fat and continues his spoof into the video by turning the original video into a comedy. He recreates the same shots, uses the same outfits and generally the same narrative--as in Fat where he wears the Michael Jackson leather suit but blows up into an obese version of himself and engages in the same gang fight as the original. To a lesser extent some other artists use spoofs of popular culture such as Eminem mocking Tommy Lee and Pamela Anderson and referring to a blow-up doll as Christina Aguilera that is being fought over by Carson Daily and Fred Durst in his video The Real Slim Shady. Another good example of a spoof video is Bowling for Soup's 1985 in which they perform in a garage and they dress in the attire of various bands that are mentioned in the song from Blondie to Bruce Springsteen to Motley Crue.

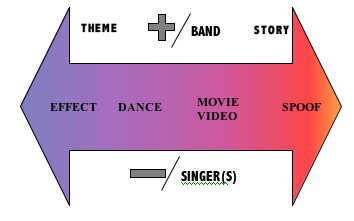
From all of this research I have created the following chart to help placement of my music video within the spectrum of videos that exist.


After creating these categories I have reconsidered them as a whole and decided that home video falls into the spoof category, theme and narrative are a larger spectrum that all videos exist within, and ballads and concert footage are merely differentiated by the performer...concert footage videos are band videos and usually include other elements from other categories and ballads are solo singers that usually incorporate other elements as well. What follows is an explanation of the spectrum above in a little more detail.
The spectrum basically exists from a theme based video, which is minimal in terms of narrative, to a full fledged story. For the most part effect videos are not focused on the story as they showcase the effect, dance videos inherently have more narrative than an effect, movie videos contain implicitly the story of the movie they are for (and usually reference some of the plot) and spoof videos reference popular media of some sort and create a commentary on it. As well, depending on whether the performer is a band or a solo singer or singers affects the ability to tell the story and changes the conventions of the video. Because a band usually presents themselves playing the instruments and are all gathered together in a standard stage setup there is less mobility than with a solo performer who can sing in any situation. This is not to say a story cannot be told in a band video, it is just done differently, so the vertical spectrum indicates whether there is a band or individual singers while the horizontal represents the level of narrative within each category of music video.

This will be really helpful for my research paper for which the first draft is due next week.

September 27, 2006

Preliminary Storyboards

First, here are my preliminary storyboards:


Currently, I'm working on posing the character I built in Advanced Modeling in NURBs in 3d for camera placement and character positioning. I started by converting the character into a unified poly mesh (below):


And I've been working on laying out the UVs, as seen in a shot of the UV texture editor (below):


So, the plan is to finish layout UVs so that none are overlapping (the mouth still needs to be separated and the face needs some tweaking...and then build the rig, rig the character, pose and start moving the camera around.